A portable charging station is one of the most important pieces of equipment for anyone who flies electric aircraft, and while there are some nice commercial units on the market, I prefer something more compact and designed to my specs. Here, we’ll cover a simple procedure for installing an AC power supply, a charger, and parallel boards in a travel case. While we’ll cover specific choices, this general procedure can be adapted to a variety of hardware.
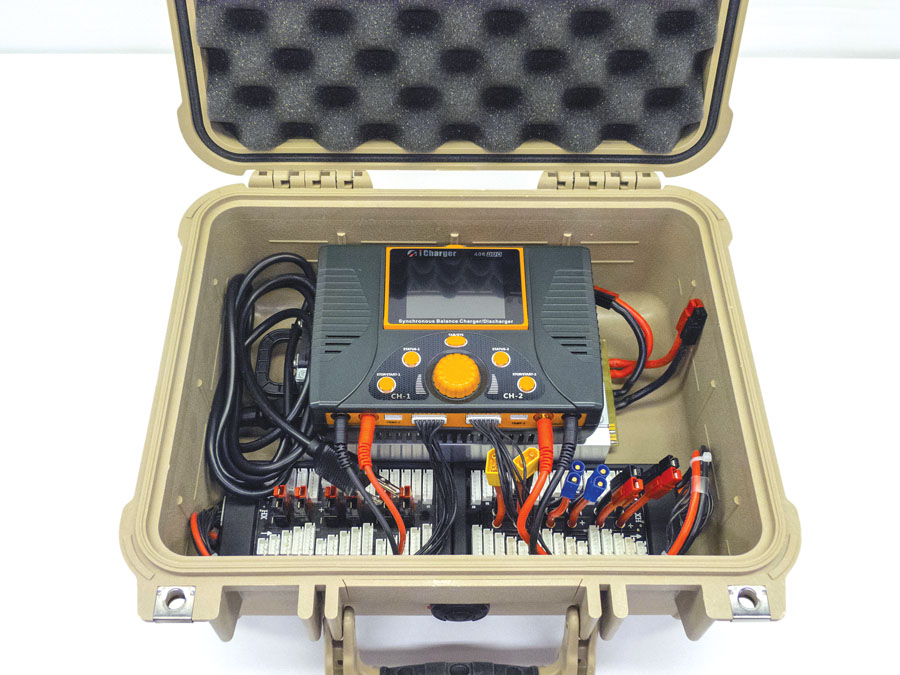
A good charging station makes flying much more convenient. This system can charge up to 12 batteries simultaneously while providing dual displays of charge status and internal resistance.
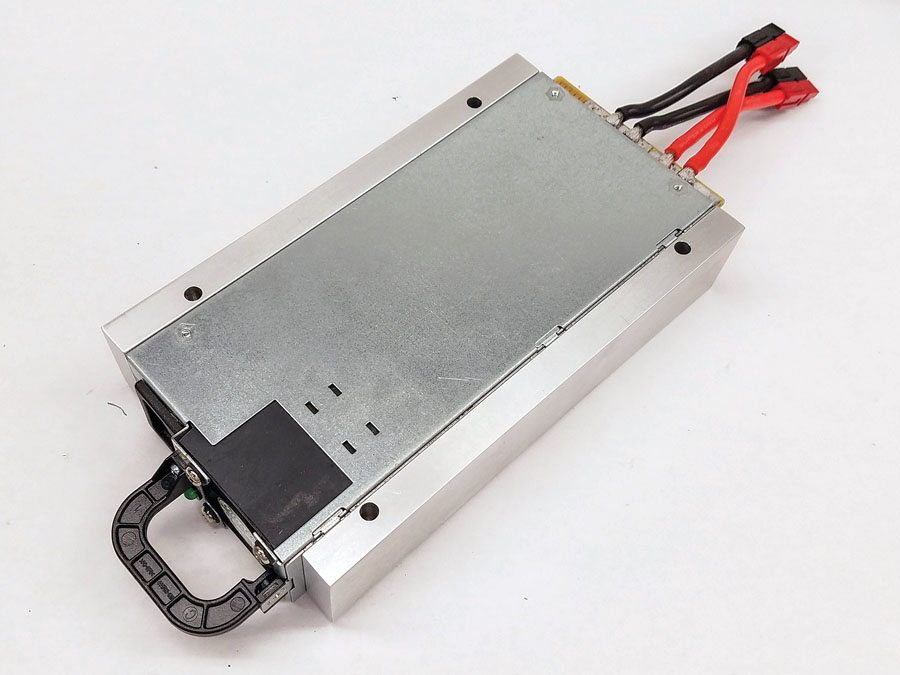
There are many power supplies targeted specifically for electric fliers, but I prefer to use the widely available Hewlett-Packard DPS-1200FB, which is designed for rack servers. Despite its compact size, the DPS-1200 puts out 900 watts on 120-volt AC, and you can find them on eBay for less than $50. There are lots of choices for cases, but I’ve been a fan of Pelican cases for years. Pelicans are extremely tough and completely waterproof, and if you’ve ever left your charger at the field, you’ll understand why that’s important. For this project, I chose an iCharger 406 Duo, which has dual 40-amp outputs and a split-screen display.
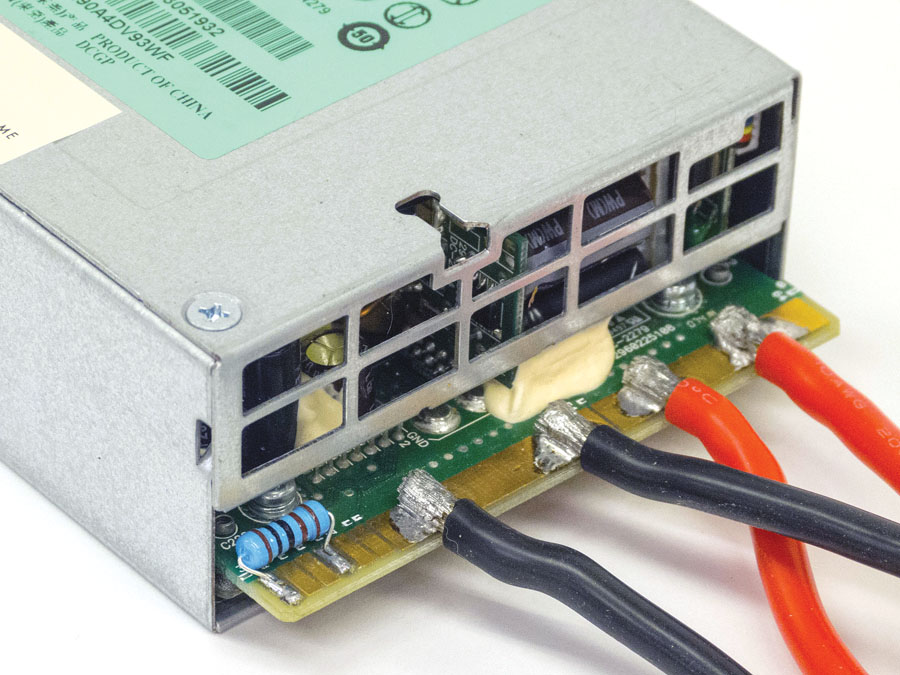
ONE
Before assembling your charging station, you first need to modify the DPS-1200FB power supply so that it can power a charger. As shown here, a 330Ω or 1K resistor must be soldered across terminals 33 and 36 to trick the supply into turning on. Then you need to solder heavy power leads to the wide power terminals labeled 51 and 64. I install two leads just in case I ever need to power a second charger.
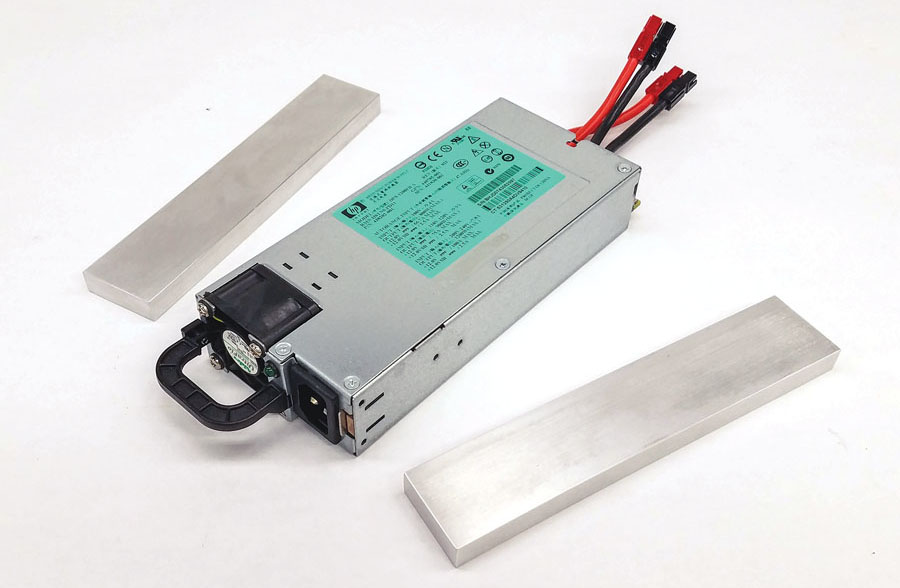
TWO
Two mounting blocks tie the whole “stack” together and mount it in the case.
While wood 1 x 2-inch would work, I ordered 1/2 x 1 1/2-inch aluminum bar stock from Metals Depot (metalsdepot.com); aluminum looks more professional and provides a generous heat sink for the power supply. I cut and squared two blocks 7 1/2 inches long.

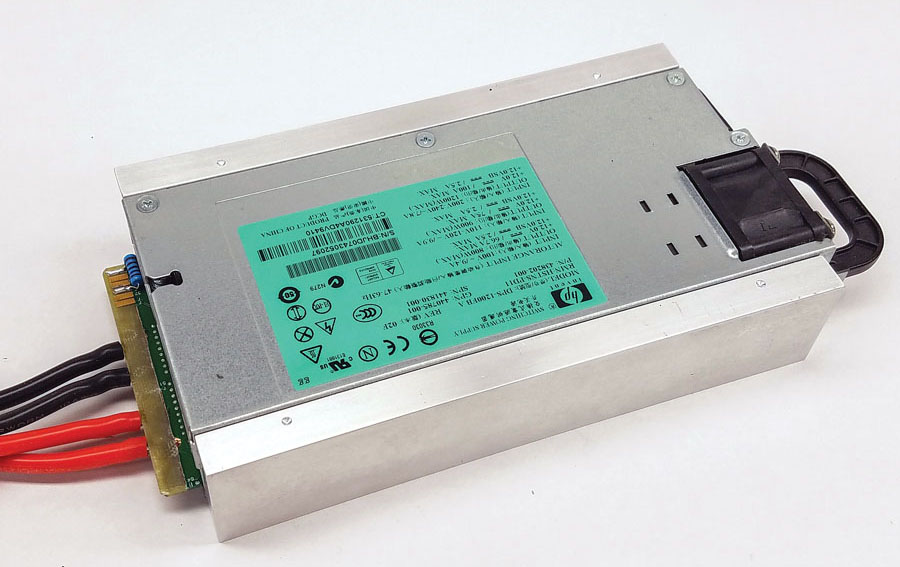
THREE
To get optimal heat transfer, I mounted the blocks to the power supply with 3M transfer adhesive, although thin two-sided tape would also work. You now have a solid base wide enough for mounting your charger.
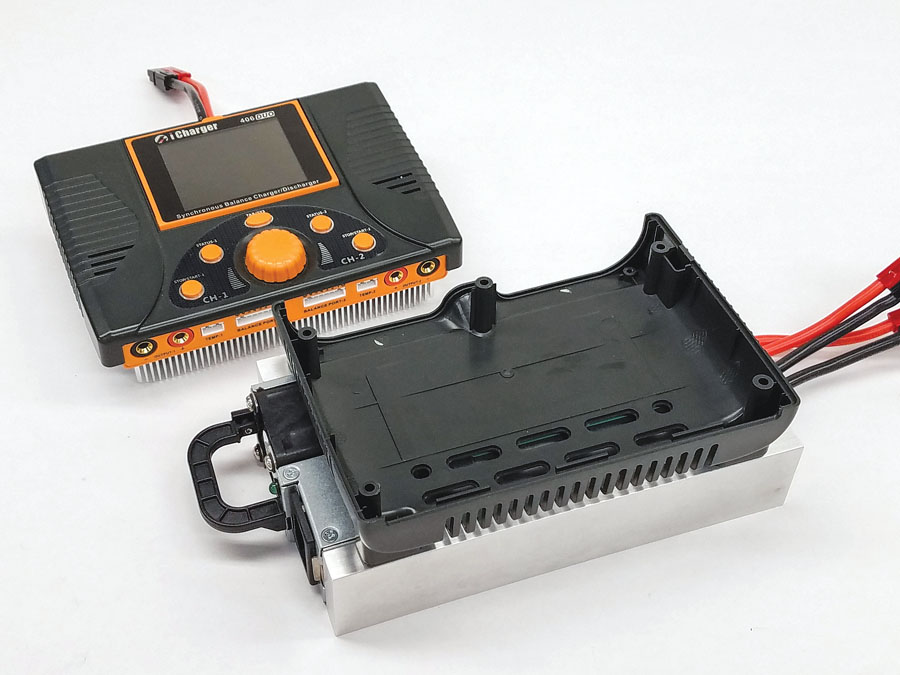
FOUR
The iCharger 406 Duo happens to have screw bosses molded right into the case (nice touch). I temporarily mounted the lower shell on the power supply so that I could mark the hole locations on the aluminum blocks.
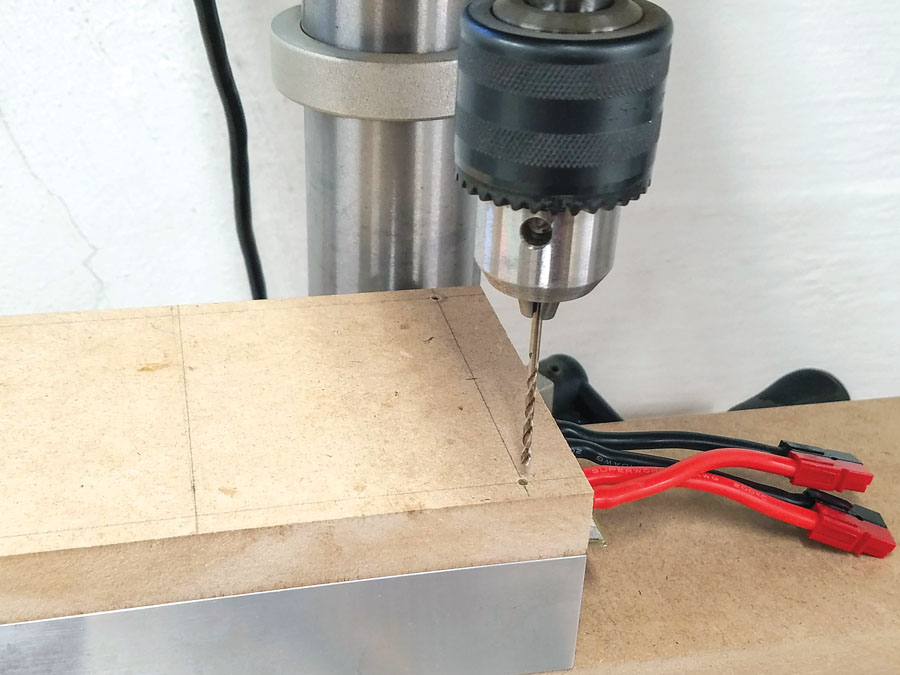
FIVE
Here, you can see the hole locations marked. Use a drill press to drill 7/64 holes clear through the blocks. A drill press is important because these holes need to be perfectly straight. Use cutting fluid to make sure you don’t break the skinny drill.
SIX
Once you’ve drilled all four holes, flip the assembly over and counterbore the holes to 7/32, making sure you stop 1/4 inch before breaking through. Again, a drill press is much better for doing this accurately.
SEVEN
Next up is drilling the holes for mounting the assembly in the case. The easy way to do this accurately is to make a temporary drill guide out of MDF (medium-density fiberboard) or scrap lumber. Make sure your hole locations won’t interfere with the raised ribs on the bottom of your case or the holes you’ve already drilled. For my Pelican 1400 case, 6 3/16 inches was just right.
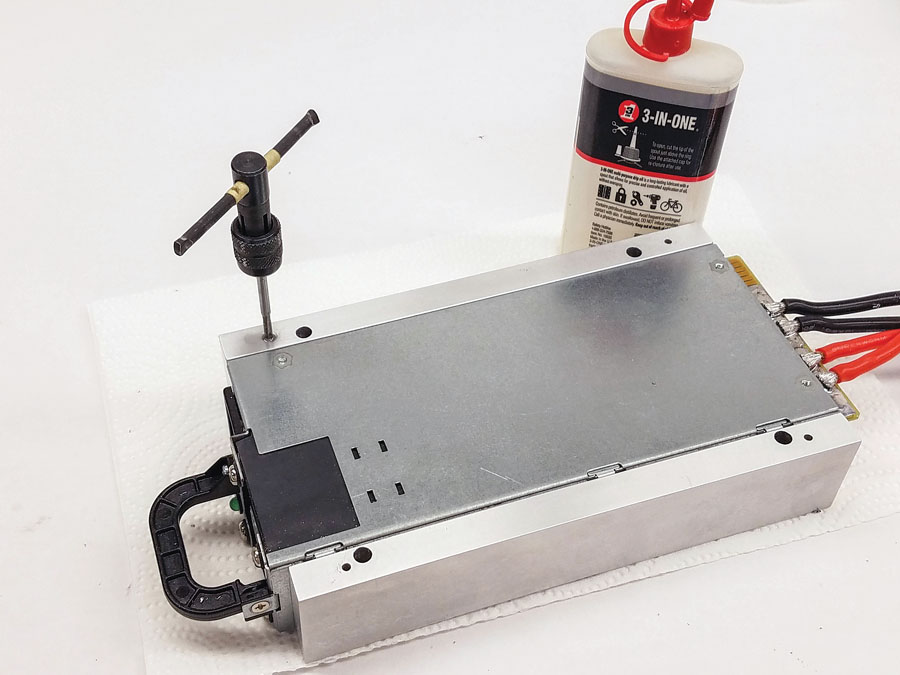
EIGHT
After drilling pilot holes with the appropriate drill size, it’s time to carefully tap the holes. I used M3 screws, which call for a 2.5mm drill. Take your time with this step, and use lots of cutting fluid. If you break a tap, you have a problem on your hands.
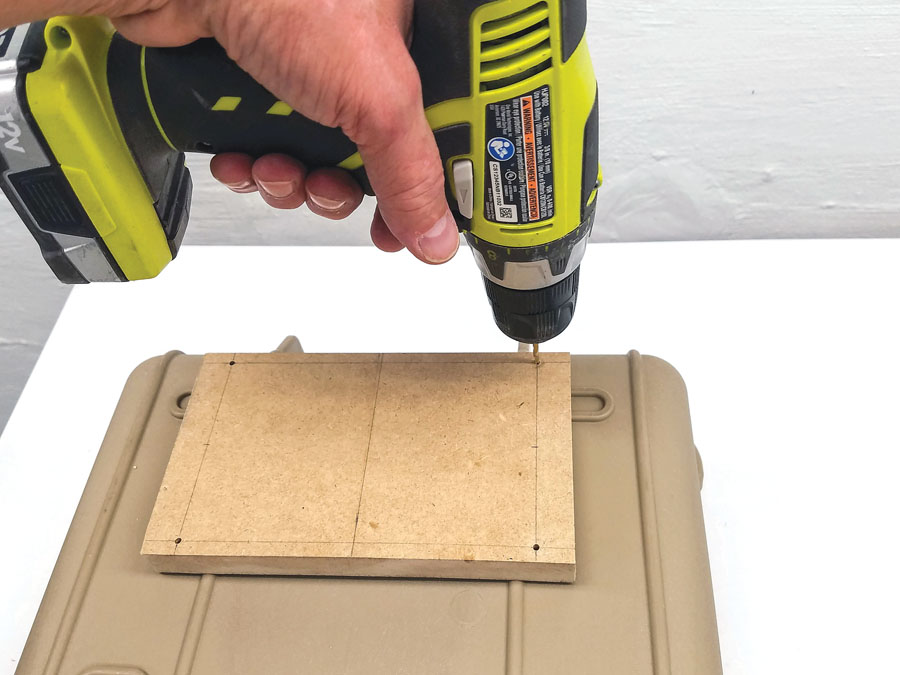
NINE
With the mounting holes tapped, you now need to drill the holes in the case. Temporarily stick the drill-guide block to the bottom of the case with transfer adhesive or two-sided tape and then carefully drill through the holes. Note that I never cut cooling holes in my charger cases as I want to preserve the Pelican case’s watertight integrity.
TEN
The final assembly consists of inserting no. 6 x 3/4-inch sheet-metal screws into the counterbored holes and driving them into the screw bosses on the charger. The entire stack is then dropped into the case and secured with M3 x 12mm pan-head screws. Charge leads and balance boards or parallel boards can be secured inside the case with Velcro and pulled out for use, or you can install a platform at the front of the case for mounting them. The Pelican 1400 provides room to spare for the power cord and accessories, such as adapters and your voltage checker. You now have a compact charging station that can provide years of service.
BY JIM RYAN


