Editing video content is like sculpting. Each cut and trim shapes the story, turning raw footage into something compelling. DaVinci Resolve is the sculptor’s chisel of video editing, packed with precise tools. This guide dives into how to cut video in DaVinci Resolve, making your edits go from rough to polished with ease.


When starting, knowing how to cut in DaVinci Resolve is crucial. It’s like knowing how to use a chisel for sculpting. With DaVinci Resolve, cutting clips is straightforward. You can use the Cut tool or keyboard shortcuts – Command B (Mac) or Ctrl B (Windows) – making quick work of slicing through your video timeline. This is essential for shaping your narrative, allowing you to remove unwanted parts or rearrange clips to tell your story better.
Blade Edit Mode in DaVinci Resolve offers even more precision. It lets you select the exact frame for your cut, ensuring that each edit is as accurate as possible. This tool is perfect for fine-tuning, making sure every cut contributes to the overall vision of your project.


Getting Started with DaVinci Resolve
Starting with DaVinci Resolve might feel like stepping into a new studio filled with unfamiliar tools. Think of the Edit tab as your workbench. This is where your video clips lay, waiting to be shaped into your final masterpiece. It’s crucial to keep this space organized. Imagine trying to sculpt without knowing where your tools are; the same goes for editing. Organizing your clips and workspace right from the start can make your editing process smoother and faster, laying a solid foundation for the creative journey ahead.
Learning how to cut in DaVinci Resolve is like learning the first strokes in painting. The cut clip feature is your basic brushstroke, an essential skill in your editing toolkit. It allows you to trim down lengthy footage, remove unwanted scenes, or rearrange your story’s flow. Familiarizing yourself with how to cut a clip in DaVinci Resolve early on will pay off, making more complex editing tasks feel less daunting as you progress.


Basic Cutting Techniques
Cutting clips in DaVinci Resolve is a fundamental skill that every video editor needs to master. Think of it as the initial step in sculpting your raw footage into a polished final product. This tutorial will guide you through the process of using the Cut tool and Blade Edit Mode in DaVinci Resolve, ensuring you can make precise cuts and edits with ease.
Using the Cut Tool for Basic Edits
- Open DaVinci Resolve: Start by launching DaVinci Resolve and opening your project.
- Select Your Clip: On the timeline, click to select the clip you want to edit.
- Activate the Cut Tool: You can activate the Cut tool by clicking on the razor icon in the toolbar above the timeline. Alternatively, you can use the keyboard shortcut Command B (Mac) or Ctrl B (Windows) to activate it.
- Make Your Cut: With the Cut tool activated, move your cursor to the point on the clip where you want to make the cut. A simple click will slice the clip into two parts. You can then select and delete any unwanted sections, or move them around on the timeline.


Precision Editing with Blade Edit Mode
- Switch to Blade Edit Mode: For more precise edits, switch to Blade Edit Mode by pressing the B key on your keyboard or selecting the blade icon from the toolbar.
- Choose the Exact Frame: Scrub through your clip in the timeline to find the exact frame where you want to make the cut.
- Cut at the Frame: Once you’ve found the perfect frame, click to make the cut. Blade Edit Mode allows for frame-by-frame precision, ensuring your cuts are exactly where you want them.
Tips for Effective Cutting
- Zoom In for Precision: Use the zoom controls to get a closer view of your timeline. This will help you make more accurate cuts, especially when using Blade Edit Mode.
- Use Snapping: Enable the snapping feature to make it easier to align your cuts with other clips or timeline markers.
- Review Your Edits: Always play back your edits to ensure the cuts are smooth and achieve the desired effect.
Advanced Cutting Techniques in DaVinci Resolve: A Comprehensive Tutorial
Mastering advanced cutting methods in DaVinci Resolve enhances your video editing skills, allowing for more dynamic storytelling and polished results. This tutorial will delve into splitting, trimming, and cropping clips, providing step-by-step instructions to refine your editing workflow.


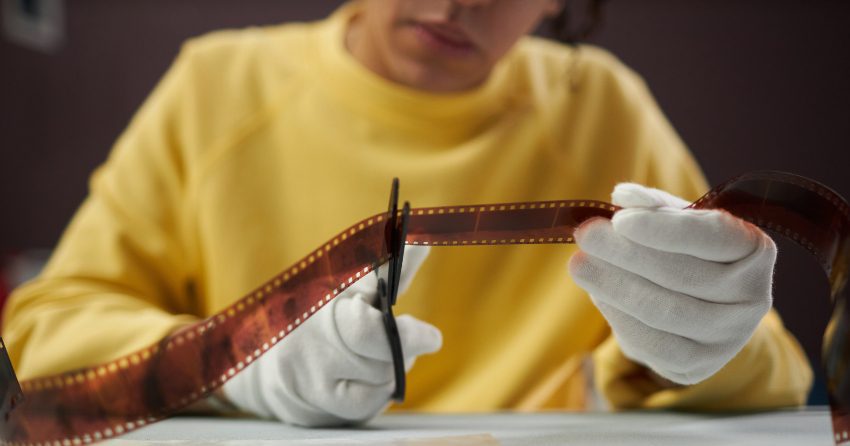
User using Blade Edit Mode on several spots on the video for article covering How to cut a clip in DaVinci Resolve.
Splitting Clips for Flexibility
- Position the Playhead: Navigate through your timeline and position the playhead where you want to split your clip. Think of this step as deciding where to make a cut with a pair of virtual scissors.
- Split the Clip: Press Command B (Mac) or Ctrl B (Windows) to split the clip at the playhead’s location. This action divides your clip into two separate parts, which you can rearrange or edit independently.
Trimming Clips for Precision
- Enter Trim Mode: To start trimming your clips, press T on your keyboard. This action switches DaVinci Resolve to Trim Mode, giving you detailed control over the start and end points of your clips.
- Adjust Start and End Points: Click and drag the edges of your clip to adjust its duration. Trimming allows you to remove excess footage from the beginnings or ends of your clips without altering their position on the timeline.
- Use Custom Keybinds: For editors looking to expedite their trimming process, DaVinci Resolve offers the option to create custom keyboard shortcuts (keybinds). Setting up keybinds for your most-used trimming actions can significantly speed up your editing workflow.


User using Trim Mode for article on how to cut in DaVinci Resolve.
Cropping Videos to Enhance Focus
- Select Your Clip: Click on the clip you wish to crop in the timeline to select it.
- Open the Inspector Window: With your clip selected, navigate to the Inspector window, which is typically found in the upper right corner of the interface.
- Adjust Crop Parameters: In the Inspector window, locate the Crop section. Here, you can adjust the top, bottom, left, and right crop parameters. Cropping allows you to focus on the most important elements of your footage, much like zooming in with a camera lens to highlight your subject.
Crafting Visually Compelling Stories
The techniques of splitting, trimming, and cropping are foundational yet powerful tools in your DaVinci Resolve editing arsenal. By employing these methods, you can craft videos that not only capture but also hold your audience’s attention through precise storytelling and focused imagery.
As you become more comfortable with these advanced cutting methods, you’ll discover the vast creative possibilities they unlock. Whether you’re rearranging scenes for better narrative flow or focusing in on the crucial moments of your footage, these skills are essential for creating engaging and impactful videos.
Tips and Tricks for Efficient Video Cutting
Boosting your video cutting efficiency in DaVinci Resolve is all about getting to know the keyboard shortcuts. These shortcuts are like secret codes that make your work faster, letting you do more in less time. For example, learning how to cut in DaVinci Resolve using just a simple key press can transform your editing workflow.
But, watch out for the traps that can slow you down. One common mistake is cutting too much from your clips. It’s like trimming a plant; cut too much, and you might lose the essence of what you were trying to showcase. Also, keep an eye on your audio and video tracks. They need to move together, like dance partners. If they fall out of sync, your video might not make sense to your viewers.
A bit of practice goes a long way. Start slow, get to know the shortcuts for how to cut a clip in DaVinci Resolve, and soon you’ll be editing your videos with ease and speed. Remember, every editor started somewhere, and with patience and practice, you’ll find yourself avoiding those common pitfalls effortlessly.
Linking to Scene Cut Detection Tutorial
A noteworthy feature in DaVinci Resolve is the Scene Cut Detection tool, which automatically identifies and splits different scenes within your footage. This can be a significant time-saver for editors working with lengthy clips. For an in-depth look at this feature, refer to the tutorial, “How to Use Scene Cut Detection to Import Video into DaVinci Resolve” ([URL here]), enhancing your cutting workflow further.
The Scene Cut Detection tool in DaVinci Resolve is a game-changer for video editors who work with lengthy clips and need to split them into individual scenes quickly. This feature uses advanced algorithms to analyze your footage and identify where cuts occur automatically. Here’s a simple guide on how to use the Scene Cut Detection tool effectively:
- Open DaVinci Resolve: Start by launching DaVinci Resolve on your computer. Ensure you’re working in a project where you want to use the Scene Cut Detection tool.
- Import Your Footage: If you haven’t already, import the clip you want to analyze into your project’s media pool.
- Access Scene Cut Detection:To access this tool, begin by navigating to the Media page. Here, you’ll find your library of clips ready for editing. Locate the clip you intend to analyze, right-click on it to reveal a context menu, and select “Scene Cut Detection” from the options presented. This action opens the Scene Cut Detection window, a dedicated space where DaVinci Resolve automatically identifies and marks the transition points between different scenes within your footage.
- Analyze Your Clip: Click the “Analyze” button in the Scene Cut Detection window. DaVinci Resolve will now scan through your clip, identifying potential cuts. This process may take some time, depending on the length and complexity of your footage.
- Review and Adjust Cuts: After the analysis is complete, you’ll see a timeline with markers indicating where DaVinci Resolve has detected scene cuts. You can review these cuts and make adjustments if necessary. If you find a cut that has been missed or incorrectly marked, you can manually adjust it by adding or removing markers.
- Add Cuts to Timeline: Once you’re satisfied with the detected cuts, click the “Add Cuts to Media Pool” button. DaVinci Resolve will split your clip into individual scenes based on the markers and add them to your media pool, ready for you to drag onto your project timeline for further editing.
Begin Editing: With your clips now split into individual scenes, you can start the creative process of editing your video, adding effects, transitions, and more.


Using the Scene Cut Detection tool can significantly speed up the initial phase of your editing workflow, especially when working with long, uncut footage. It allows you to jump straight into the creative aspects of editing without spending hours manually splitting your clips into scenes.
Take your editing game to the next level with Envato Elements.
Elevate your video editing projects with Envato Elements. This premium service offers access to an extensive library of resources, from video clips to sound effects, tailored for DaVinci Resolve users. The benefits of integrating these high-quality assets into your projects are manifold, ensuring your edits stand out. Discover more and explore the offer at Envato Elements.


Conclusion
Mastering the art of cutting in DaVinci Resolve is a journey of discovery, one that rewards patience and practice with impactful storytelling. By leveraging the tips and techniques outlined in this guide, you’re well on your way to refining your video edits, turning raw footage into cinematic gems.
This guide aims not only to instruct but also to inspire. With DaVinci Resolve as your tool and creativity as your guide, the possibilities are limitless. Happy editing!


