Adjustment layer Premiere features let you make consistent edits – quickly. A Premiere Pro adjustment layer lets you add edits, corrections, and effects to multiple clips at the same time. Essentially, it sits on top of clips in your timeline and applies edits to all of those clips. It’s easy to imagine how useful this is to streamline the editing process.
In this tutorial, you’ll learn how to add an adjustment layer in Premiere Pro. Fortunately, it’s an easy and quick process. Remember, the goal here is really to work more efficiently. You’ll find that when you add adjustment layers in Premiere, you’ll do just that.
Add adjustment layers in Premiere to take advantage of the following:
- Efficient workflow. Adjustment layers offer the ability to apply edits to multiple clips at once. These layers help you edit in bulk, fast.
- Non-destructive changes. Want to remove or reverse edits? By changing (or removing) your adjustment layer, all of your clips will return to their original state.
- Versatility. Adjustment layers are stackable. That means you can add several at one time, one over the other. This helps you dial in custom effects with great impact.
Let’s get started! In a few steps, you’ll learn how to make an adjustment layer in Premiere for all of your project needs.
How to Add an Adjustment Layer in Premiere Pro (Step by Step)
Let’s learn how to add adjustment layer Premiere Pro effects with ease. It’s a simple process that you’re sure to find yourself using over and over again. Indeed, it’s the best way to make edits to multiple clips at once. It’s one of my favorite Premiere Pro tips for that reason alone.
In our tutorial, we’ll be working with three pieces of stock footage. All are from Envato Elements. There, you can download as many stock videos as you want for one flat monthly rate. You can find links to them here, here, and here. Download them today if you want to follow along.
1. Add an Adjustment Layer to Your Project
With Premiere Pro open, let’s get oriented on the interface. As you can see in the screenshot below, I have three clips placed on my Timeline. They’re back to back to back, meaning they’ll play seamlessly in sequence.


What I’d like to do is apply some edits to all three clips at once. And a Premiere Pro adjustment layer is the perfect way to do exactly that. For example, I want to choose a new vibrant color grade and use it across my project.
Adjustment layers work for any effect edit that you can make in Premiere. But one of the most popular ways to add adjustment layers in Premiere Pro is for colors.
To add an adjustment layer, navigate to the Project panel in Premiere Pro. You’ll find it in the left section of your screen. At the very bottom, you’ll see a row of small icons. One of them is labeled New Item, and it kicks off the Premiere Pro add adjustment layer steps.


When you click New Item, a list of options will appear right above the icon. From it, go ahead and choose Adjustment Layer. You’ll see a menu, confirming the resolution options for your layer.
In almost every case, the default options are the way to go. Click OK. This will add an adjustment layer to your project. It’s that easy!
2. Customize the Adjustment Layer Effects
Your Premiere Pro adjustment layer is now created. You’ll see it in the Project panel, right above the other content listed there. The next step is to add the layer to your project clips. To do that, click and hold on Adjustment Layer.
Then, drag it onto your timeline. Place it directly above the first clip in your sequence. And finally, move the Playhead over the adjustment layer. By default, the adjustment layer likely won’t cover every clip you have in place. That’s no problem – we’ll make that change soon.
Now, let’s get to work making edits with these Premiere Pro add adjustment layer steps. To start, go ahead and click on the adjustment layer in your timeline. You’ll see it selected with a light border around it.
Then, go ahead and launch the editing panels that you want to work with. Again, a common use here is color. With that in mind, let’s launch the Color workspace by clicking on the Color tab.


On the right side of your Premiere Pro screen, you’ll see the Lumetri Color sidebar launch. Once you add adjustment layer Premiere effects, this is an amazing way to bring them to life.
On the toolbar, you can apply an array of color grading effects and edits. For example, you can make quick edits to the temperature, tint, and saturation. Similarly, we can edit the light and how it shows in the clips. You can adjust highlights, contrasts, exposures, and more.


The editing process here can take many forms, and they’re beyond the scope of this tutorial. But, they’re the perfect follow-up to learning how to add adjustment layers in Premiere Pro. If you’re interested in a full guide to color grading in Premiere Pro, check out our complete tutorial:
In the meantime, you can make adjustments here, and watch them preview in real time on the first clip in our sequence. Remember, we’re not actually editing the clip itself. Instead, we’re building the adjustment layer.
It applies to any clip that lies below it. But the clips themselves remain physically unchanged. Think of an adjustment layer as a lens that all clips are filtered through.
Here, your creativity is really the only limiting factor. Explore different edits and see how they look. But when put to good use, adjustment layer Premiere designs help you rapidly apply vibrant and consistent edits across your entire project.
3. Apply to the Full Range of Clips
We’re almost done learning how to make an adjustment layer in Premiere. The last step in the process here is to apply your Premiere Pro adjustment layer to the full range of clips in your sequence. This is very easy to do. It’s how to add an adjustment layer in Premiere Pro to all of your clips at once.
Navigate to the Timeline on your Premiere Pro screen. With the Selection Tool activated, click and drag the right side of the adjustment layer over the top of the clips on the track below.

Boom! This will apply the edits you’ve made in the adjustment layer to all of the clips in your project. Premiere Pro adjustment layers give you consistency with less work than ever before.
You just learned how to make an adjustment layer in Premiere in moments. As you can see, it’s a simple process that will save you hours of work over time.
5 Top Premiere Pro Design Tips and Tricks (For 2024 and Beyond)
You now know how to add adjustment layer Premiere Pro effects quickly and easily. But to succeed and craft your own amazing videos, it pays to learn more. Below, we’ve collected five quick design tips to help your Premiere Pro projects look their best:
1. Embrace Dynamic Text Effects
When you work with video in Premiere Pro, it’s easy to forget a key fact. What’s that? Text is a key part of a successful video! Think of titles, captions, and more. These add helpful context and keep your audience focused.

Caption: The Text Opener for Premiere Pro animates text in stunning styles.
By using dynamic text effects with animations and cool overlays, your videos will shine. Premiere Pro has an array of text tools built in. Check them out to ensure that your videos look their absolute best.
2. Create Smaller, Shareable Videos
The best videos are useless without an audience. So, how can you be sure you’re able to share with the world? For one, it’s vitally useful to cut down the file size of your projects. This lets you share them more widely and upload to popular sharing platforms.
This works perfectly with what you learned about how to make an adjustment layer in Premiere. We’ve collected a few ideas on how to do exactly that. Read the full tutorial here to learn more. Soon, you’ll be sharing with a broader audience:
3. Use Transitions for Dramatic Changes
When you move from scene to scene, it pays to find a way to make the motion smoother. Simply jumping from one clip to another can seem choppy and distract your audience. That’s where transitions come in.
Remember – you just learned how to make an adjustment layer in Premiere for consistency. You should combine this with transition effects between scenes. That gives your production a cohesive feel.

Caption: Premium from Envato Elements, these Grunge Transitions enable sleek changes from scene to scene.
In 2024 and beyond, be sure to use powerful transition effects in your videos. They keep the action smooth, and they help your viewers stay engaged with you. Use them whenever you’re moving from scene to scene in Premiere Pro to deliver a more dramatic look.
4. Be Creative with Audio and Music
Sounds truly from the backdrop of any successful video. Thus, it’s essential to mix and edit them so that they sound great. Mixing audio with effects is easy, and it helps you stay in balance.
Want to learn more about audio in Premiere Pro? We have a full tutorial just for you, and you can read it here:
5. Build Designs for Social Media
Videos are meant to be shared. And increasingly, that means posting them on social media. But think of the most popular social media apps. Many of these fully embrace short-form content, vertical videos, and more.
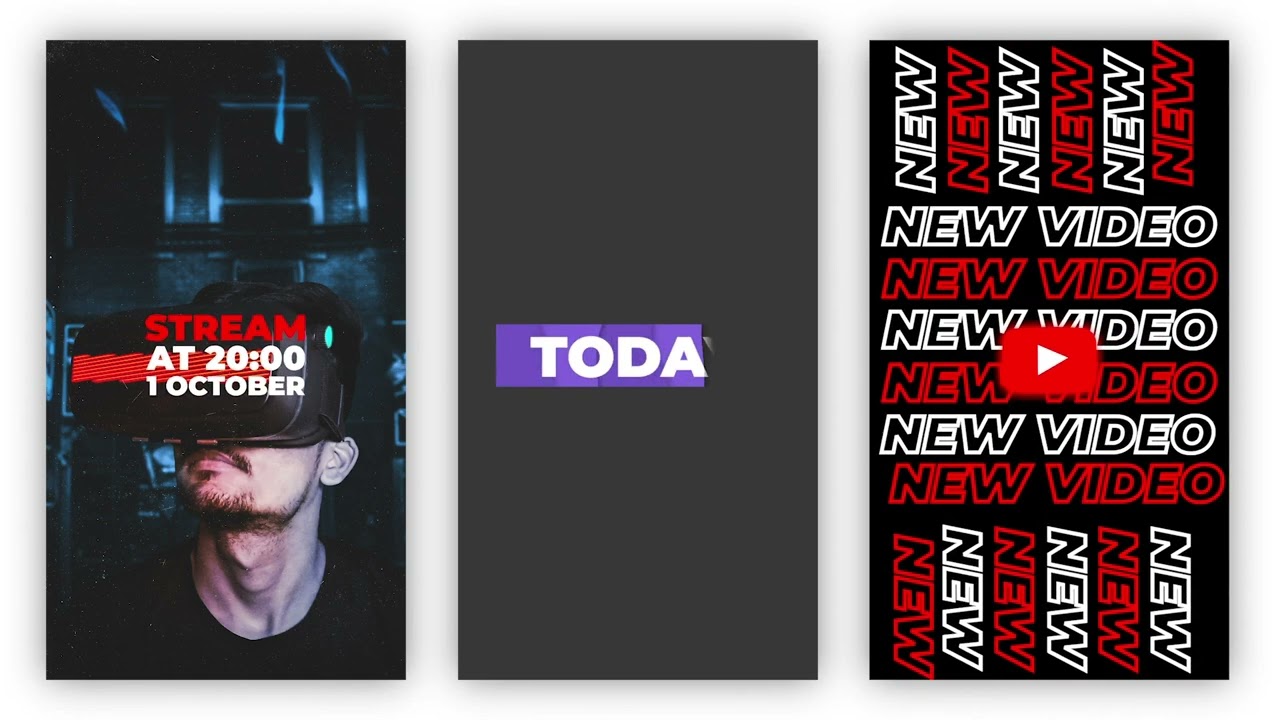
Caption: These Premiere Pro templates are optimized for Instagram stories.
That’s where Premiere Pro templates with a social focus come in. These designs are optimized for social media sharing. Consider them an essential part of your 2024 editing toolbox in Premiere Pro.
The Top Source for Stunning Premiere Pro Video Templates (With Unlimited Downloads)
Envato Elements is the ultimate source for the very best Adobe Premiere Pro video templates. With thousands of designs to choose from, you can find top options for all of your project needs.


The Elements offer is unbeatable: unlimited downloads. For a flat monthly rate, you can download and use as many premium Adobe Premiere Pro templates as you want! And that’s just the beginning.
Also included with Elements are stock videos, music, fonts, graphic templates, and so much more. The full library numbers 14 million digital assets and counting.


When you choose premium Premiere Pro templates from Envato Elements, you’ll experience the very best in design and quality. Download one today and enjoy:
- Sleek, cinematic features. Videos built with Envato Elements templates look right at home at the movies. No basic, simple effects will be found here! Instead, you’ll enjoy studio-grade designs that work great for projects with even the largest audiences.
- Easy-to-use layouts. Premiere Pro premium layouts from Elements are crafted with you in mind. You won’t have to struggle through complex designs or confusing features. These templates are intuitive. And many come with helpful support options as well, like written guides or video tutorials.
- Creative designs. Searching for design inspiration? You’ve found it, thanks to premium Envato Elements templates. Designs here are robust and creative, helping you share your content in new and creative ways.
The choice is simple. Envato Elements is absolutely the best value for creatives today. Join now and start exploring the vast library of digital assets. You’ll be glad you did!
Now You Know to Make an Adjustment Layer in Premiere Pro
Today, you learned how to make an adjustment layer in Premiere Pro. This is one of the very best ways to edit more efficiently. That’s because you can apply identical effects and edits to multiple clips at the same time! Gone are the days when you have to repeat adjustments over and over.
So, why wait? Take your new adjustment layer for Premiere skills and put them to use today. Learning how to add an adjustment layer in Premiere Pro saves you time and frees you up to create more great videos.


