In this tutorial, you will learn how to create Grand Theft Auto 5 cover art in Photoshop. I will explain everything in so much detail that everyone can create it, even those who have just opened Photoshop for the first time.
Are you looking for a GTA cover art Photoshop action that will do all the work for you? Check out the Grandiose 2 Photoshop Action over on Envato Elements, where you can find thousands of awesome effects!


With this GTA action you can create advanced, cartoon GTA-inspired art quickly and easily. You can use your own text with the GTA style, and you also get the GTA 5 poster maker action to create a GTA cover with your photos once you have 12 photo examples ready. The action also creates 11 color looks that you can choose from!
What You’ll Learn in This Grand Theft Auto Cover Photoshop Tutorial
- How to make a GTA cover template
- How to create GTA 5 cover photo look
- How to make your own GTA cover
- How to create GTA cover art text
- GTA 5 poster maker actions
What You’ll Need
To recreate the design above, you will need the following resources:
1. How to Start Creating a GTA Cover Template
Step 1
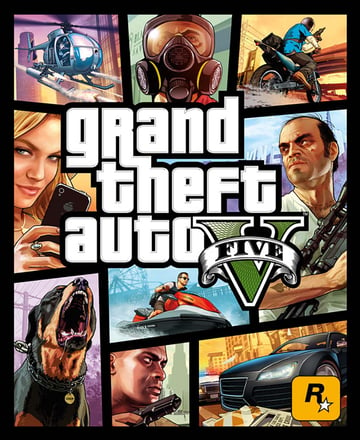
Have you ever thought of creating a GTA 5 cover template with your photos? That is exactly what we are going to do in this tutorial. We’re going to create the GTA cover art with photos of our choice (which means you can use your own photos as well)! Before we get started, let’s quickly check out the original GTA V cover photo:


Step 2
As you can see from the screenshot above, what we are going to need to recreate the GTA 5 cover photo are the specific cartoon-style photos, text with an effect, and a nice frame to place everything into.
We are going to start by picking up the photos. If you’re looking for stock photos, check out Envato Elements, where you can choose from nearly 5 million photos. Look for the photos that are not heavily edited as we’ll have to apply our own effects to them later. Here is my choice:


Step 3
Now that we have our photos ready, we need to apply the GTA art style effect to them. For this, you can use the GTA V action, or check out the GTA Photo Effect tutorial:

Step 4
Save all the results as PSD files. Here are my results:


2. How to Make a GTA Cover Template
Step 1
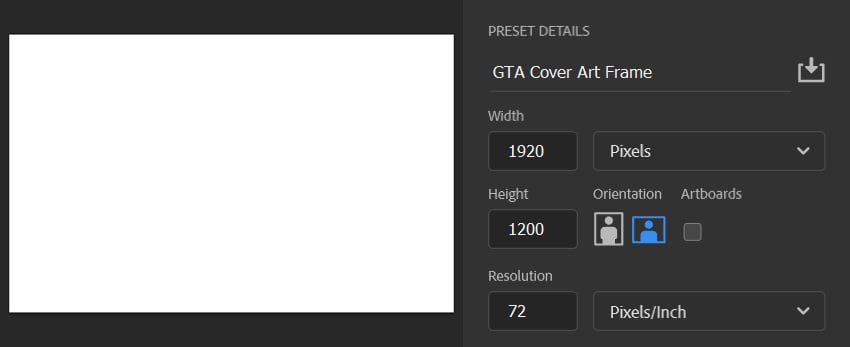
In this section, we are going to create the Grand Theft Auto cover frame to place our photos into. First, create a new file. Go to File > New, and set the Width to 1920 px, Height to 1200 px, and Resolution to 72 px/in.


Step 2
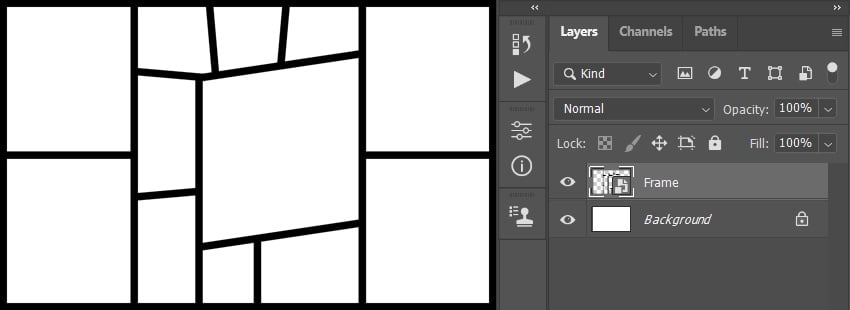
Now choose the Line Tool (U), setting the Fill Solid Color to #000000, Stroke Solid Color to #000000, and Stroke Width to 28 px. Then, click and drag to draw the frame for the first photo. Feel free to draw using as many line layers as you need.


Step 3
Repeat this step to draw the frames for the remaining photos. If you have used multiple layers, select your top line layer, and Shift-click on the bottom line layer to select all line layers between. Then, Right-click on any of the selected layers and choose Convert to Smart Object. Name this layer Frame.


3. How to Place Photos Into Your Grand Theft Auto 5 Cover Art
Step 1
In this section, we are going to place the photos into the frame. Choose the Magic Wand Tool (W), and click inside the empty space where the first photo will be placed to make a selection.


Step 2
Now go to Select > Modify > Expand, and set Expand By to 5 px.


Step 3
Select the Background layer, and press Control-Shift-N on your keyboard to create a new layer, naming it Photo_1_Place. Then, set the foreground color to #ff0000, go to Edit > Fill, and set the Contents to Foreground Color, Mode to Normal, and Opacity to 100%. After that, press Control-D to deselect the selection.


Step 4
Repeat these steps for the remaining empty spaces. Here is my result:


Step 5
Now go to File > Open, choose the PSD file of the first photo that you want to place, and click Open. Then, in the newly opened file, press Control-Shift-E on your keyboard to merge all the visible layers into one layer, Right-click on it, and choose Convert to Smart Object. Choose the Move Tool (V), and drag this layer to the frame file. Place it just above the Photo_1_Place layer in the Layers panel, and press Control-Alt-G to create a clipping mask.


Step 6
Press Control-T on your keyboard to transform this layer, and transform it as you like. Then, name this layer Photo_1.


Step 7
Now repeat these steps to place the remaining photos. Here is my result:


4. How to Create the GTA Template Text
Step 1
In this section, we are going to create the GTA 5 cover template text and place it in the frame. To create the GTA effect with your text, check out my GTA Text Effect tutorial. Here is my result:


Step 2
Right-click on the GTA Text folder and choose Convert to Smart Object. Then, choose the Move Tool (V), and drag this layer to the frame file. Place it at the top of the layers in the Layers panel, and position and transform it as you like. Here is my result:


You Made It!
Congratulations, you’ve succeeded! You’ve now learned how to make your own GTA cover in Photoshop. Here is our final GTA template result:


5 Cool GTA Photoshop Actions
Want to save time with GTA Photoshop actions? Check out this list of actions over on Envato Elements, where you can find thousands of awesome effects!
Grandiose 3 Animated Photoshop Action (ATN)


This GTA Photoshop action will help you create the most realistic GTA V art style in no time! You just open your photo, brush over your subject, and play the action. There are 16 background shapes included, with the option to add more elements to the design, like a car behind the subject or whatever your creativity brings, and an action to create a GTA text effect using your own text. You also get to animate the results like the GTA V game loading screen, with 20 preset color looks!
Grandiose Photoshop Action (ATN, PSD)


Welcome the first GTA Photoshop action ever created! It creates a realistic GTA art style effect, and the text effect is included as well as the GTA 5 poster maker action to create GTA cover art with your own photos with no work at all!
Cartoon & Vector Art Photoshop Actions (ATN)


Create four different photo effects with this set of Photoshop actions. You can choose between cartoon painting, cartoon effects, vector art, and color halftone photo effects!
Cartoonize Photoshop Action (ATN)


Here we have another cartoon Photoshop action. You can use this action to create a cartoonish digital oil painting effect using just a single click and without any professional skills!
Vector Cartoon Painting Photoshop Actions (ATN)


Create a vector cartoon look with your photos using this action! The product is made for photographers and graphic designers, and it takes only one click to get the effect!
Did you like this tutorial on how to make a GTA cover template in Photoshop? Then you may also like:


