DaVinci Resolve, a leader in video editing software, is celebrated for its advanced features and professional-grade tools. For video editors looking to elevate their work, mastering DaVinci Resolve templates is essential. These templates, offering a blend of creativity and efficiency, can transform your video projects. This detailed tutorial is your guide to navigating the world of DaVinci Resolve templates. We’ll cover everything from how to install DaVinci Resolve templates to customizing them to fit your unique vision, using resources from Envato Elements, a hub for high-quality digital content.


The process of using DaVinci Resolve video templates is straightforward yet powerful. By integrating these templates into your workflow, you can significantly enhance the visual appeal and professionalism of your projects. Whether you’re creating a cinematic intro, a corporate presentation, or an engaging vlog, the right template can make a world of difference.
In addition to video editing, broadening your skill set to include audio editing can add depth and quality to your projects. Audacity, a popular audio editing software, complements video editing well.
For those interested in expanding their audio editing skills, these resources might be helpful:


Stay with us as we delve into the exciting world of DaVinci Resolve templates. You’ll learn not just how to use these templates but also how to tweak them to your liking, making your video editing journey both enjoyable and efficient. With this comprehensive guide, you’re well on your way to creating visually stunning and professionally polished videos.
Tutorial on Installing DaVinci Resolve Templates
Step 1
Choosing Your Template
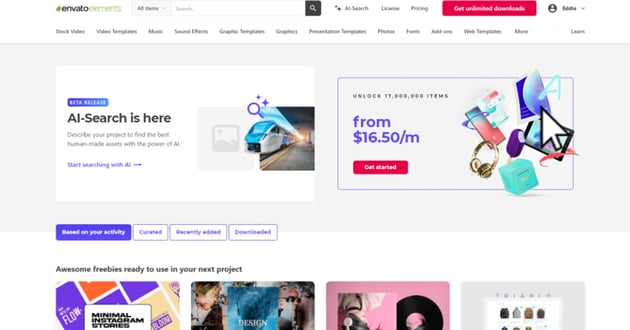
Embarking on your video editing journey begins with selecting the right DaVinci Resolve template. Envato Elements your go-to destination for this. With a plethora of options ranging from cinematic intros to corporate presentations, the platform caters to diverse creative needs. The key is to choose a template that not only fits the theme of your project but also complements your editing style. This decision is fundamental in how to use DaVinci Resolve templates effectively, as it sets the tone for your entire project.


Step 2
Downloading the Template
Select your desired template from Envato Elements and download it onto your computer. Remember to note the folder where the file is saved, as you’ll need to access this file for installation.
Step 3
Importing into DaVinci Resolve
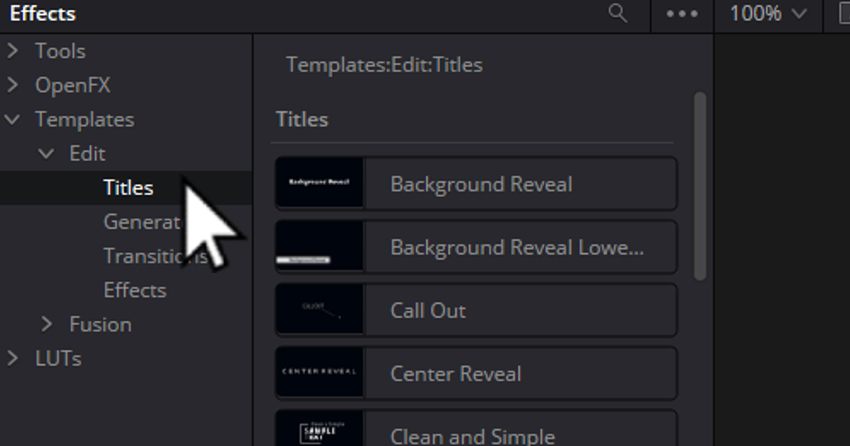
After downloading your template, open DaVinci Resolve 18. Navigate to the Fusion tab and open the Effects Library located in the top left corner. This library contains all tools, effects, templates, and even LUTs. If you have downloaded titles, for example, go to the Templates section under Edit, and select Titles.

Step 4
Locating the Installation Folder
Within the Titles section, find the three-dot dropdown menu and click on ‘Show Folder’. This action will open the appropriate folder in your file system where you should copy the downloaded presets. This method works similarly for generators, effects, transitions, and LUTs. Simply navigate to the respective category, use the dropdown menu, and select ‘Show Folder’ to locate the corresponding installation directory.


Step 5
Copying the Templates to the Folder
Copy the downloaded template files into the appropriate folder that you accessed in the previous step. This will add the templates to your DaVinci Resolve library.
Step 6
Accessing Installed Templates
Once the templates are copied to the correct folder, they should be available in DaVinci Resolve. You can now access these templates directly from the Effects Library under their respective categories (such as Titles, Effects, Transitions, etc.).
By following these steps, you can easily install and access various presets and templates in DaVinci Resolve 18, whether you are using a Mac or PC. This process will significantly streamline your video editing workflow, providing quick access to a variety of creative assets.
Using Personal Media
For incorporating your own media, import it by dragging and dropping files from your computer into the Media Pool. This allows you to personalize the template with your content.


By following these steps, you’re now fully equipped to install and use DaVinci Resolve templates, adding efficiency and professional flair to your video projects. In addition to mastering template installation, enhancing your video editing skills with transitions can add dynamic elements to your projects.
For insights into this area, this article offers practical guidance and examples of top templates that can be utilized in your edits:
Customizing Templates in DaVinci Resolve
Once you’ve mastered how to install DaVinci Resolve templates, the next crucial step is customization, where your unique creative flair comes into play. Here’s a detailed guide to help you make these templates your own:
Editing Text in Titles
- Accessing Titles: In the ‘Edit’ page, navigate to the ‘Titles’ folder within the ‘Effects Library’.
- Selecting the Title: Double-click on the title you wish to edit. This will add it to your timeline.
- Modifying Text: Click on the title in the timeline to select it. Then, go to the ‘Inspector’ panel on the right side of the screen.
- Customization Options: In the ‘Inspector’, you have options to change the text, size, font, color, and other properties. This allows you to match the text to your project’s theme and style.


Adjusting Animations and Effects
- Selecting Effect: To modify an effect, first select the segment on the timeline where the effect is applied.
- Using Inspector for Customization: Open the ‘Inspector’ panel in the upper right corner of the screen. Here, you can tweak various aspects of the effect, such as timing, intensity, and more.
Saving Custom Titles
- Saving for Future Use: After customizing a title to your liking, you can save it for future use. Simply right-click on the title in the timeline, go to ‘Settings’, and then select ‘Save’. This will store your custom title for easy access in future projects.
Final Touches
Remember, customization is key to making any template align with your specific vision. Whether it’s tweaking text or fine-tuning effects, every adjustment helps in transforming a standard template into something uniquely yours.
In addition to video editing, enhancing your audio editing skills can greatly elevate the quality of your productions. Audacity, a robust audio editing tool, can be a valuable asset in this regard.
Check out this resources to complement your video editing skills with audio expertise:
For those looking to add more creative flair to their video projects, this article provides an excellent guide on using reverse effects in your edits. This technique can add a unique dimension to your storytelling and visual presentation:
By investing time in customizing your DaVinci Resolve templates and honing your audio editing skills, you’ll be well on your way to producing videos that are not only visually appealing but also rich in quality and storytelling.
Showcase of Templates
Exploring the right DaVinci Resolve template is essential for bringing your creative vision to life. At Envato Elements, you’ll find a wide array of video templates tailored to various editing needs. Let’s take a closer look at some of the remarkable templates available:
Template 1: Dynamic Slideshow

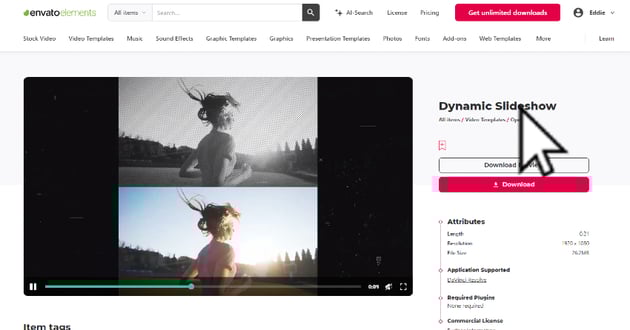

Perfect for creating vibrant and engaging slideshows, this template suits projects that need a dynamic and modern touch. Ideal for event promotions or showcasing personal portfolios, it brings photos and video clips to life with ease. Explore Dynamic Slideshow
Template 2: Elegant Corporate Presentation


This template is a top choice for professional, sleek business presentations. Its clean and sophisticated design is great for corporate videos and informational content, offering a polished and clear narrative. Discover Elegant Corporate Presentation
Template 3: Cinematic Trailer Titles

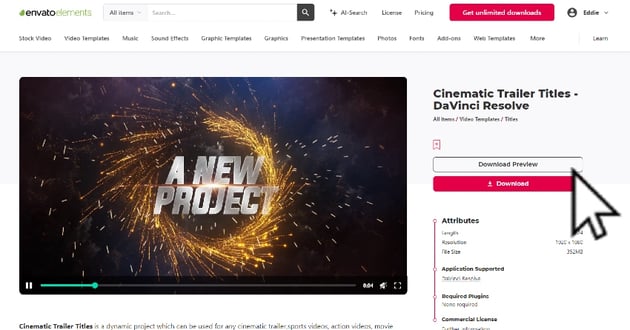

Ideal for dramatic and impactful intros, this template adds a professional cinematic touch to any video project. It’s especially suitable for short films, movie trailers, or special event videos, making a bold statement from the start. Check Out Cinematic Trailer Titles
These templates showcase the creative potential of DaVinci Resolve, making it easy to produce high-quality, professional-looking videos.
In addition to mastering DaVinci Resolve templates, enhancing your audio editing skills with Audacity can add significant depth to your projects. Audacity offers a range of tools for professional-level audio editing. For guidance, “How to Edit Audio for a Podcast in Audacity (Complete Guide)“ is an excellent starting point.
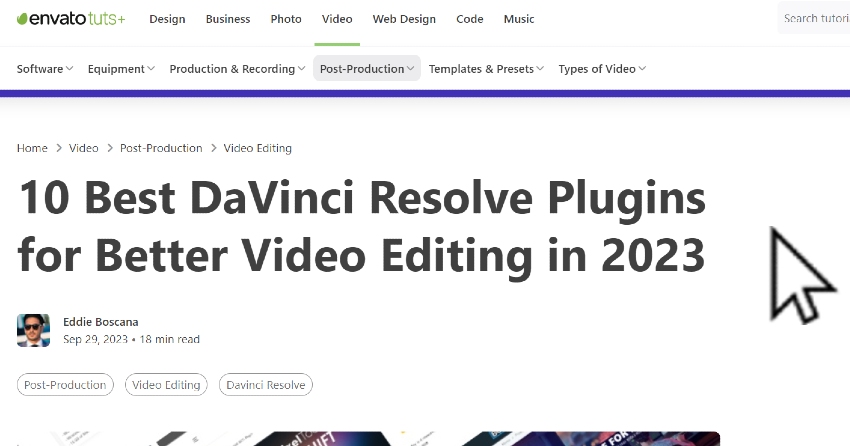
To further refine your video editing techniques in DaVinci Resolve, explore “10 Best DaVinci Resolve Plugins for Better Video Editing in 2023“. This article offers valuable insights into enhancing your video projects with top-rated plugins, thus complementing your skills in both video and audio editing.

By integrating advanced video editing techniques with superior audio editing, you can create content that is both visually striking and audibly compelling, ensuring a profound impact on your audience.
Tips and Tricks Section
Tip 1: Explore Different Templates Don’t limit yourself to one type of template. Explore various styles on Envato Elements to find what best suits your project. Experimentation can lead to more creative outcomes.
Tip 2: Keep Your Software Updated Ensure that you are using the latest version of DaVinci Resolve to take advantage of new features and bug fixes. Regular updates can enhance your editing experience.
Tip 3: Learn Keyboard Shortcuts Keyboard shortcuts can significantly speed up your editing process. Spend some time learning these for a more efficient workflow.
Tip 4: Utilize Color Grading DaVinci Resolve is renowned for its color grading capabilities. Even basic color correction can elevate the quality of your video. Check out tutorials on color grading for more detailed instructions.
Tip 5: Balance Between Video and Audio While focusing on video editing, don’t neglect the audio. Good quality audio is essential for a professional-looking video. Use tools like Audacity for more advanced audio editing.
Tip 6: Practice Regularly Regular practice is key to mastering DaVinci Resolve. Try working on different types of projects to improve your skills and understanding of the software.
Incorporating these tips and tricks into your video editing process can significantly improve your efficiency and the quality of your videos. Always keep exploring and learning to enhance your skills.
Conclusion
With these steps, you’re well-equipped to install and customize DaVinci Resolve templates from Envato Elements. This process not only saves time but also adds a professional touch to your projects. Whether you’re a seasoned editor or just starting, these templates offer endless possibilities to elevate your video editing game. So, dive into Envato Elements, and let your creativity flow!


