Video is a great way to share your stories with the world. From short films to teaching tutorials, from dramas to documentaries, video brings your message to audiences. But what if you don’t have expensive editing software to bring it to life? Fortunately, you don’t have to.
In this tutorial, you’ll learn how to use iMovie to create and edit amazing videos of your own. iMovie is a free editing app offered by Apple, and here, you’ll have everything you need to get started with it. We’ll explore key advantages and features, and then we’ll dive into a complete iMovie tutorial for beginners.
Let’s get started learning how to use iMovie!
What Is iMovie, and Why Should I Use It?
So what is iMovie, and why should you think of using it? As mentioned, iMovie is Apple’s own video editor. It’s designed as an entry-level video-editing tool. That means that you don’t have to be an expert editor to work with it. But don’t think that you’ll find only basic features. In fact, iMovie offers an array of powerful tools to help you edit and produce successfully.
Here are some key advantages and features:
- iMovie is available for free. iMovie stands out among many other video editors because you can download it for free. Other editors like Adobe Premiere Pro require a subscription to use them.
- It’s intuitive and easy to use. iMovie is made for editors of all skill levels. It’s built with the simple and sleek user interface that Apple is known for.
- Advanced features are included. Don’t confuse simple interfaces with simplistic features. iMovie has powerful tools, like green-screen effects and stabilization.
- It’s regularly updated. Updates are released regularly, so you will enjoy new features as soon as Apple rolls them out (at no charge).
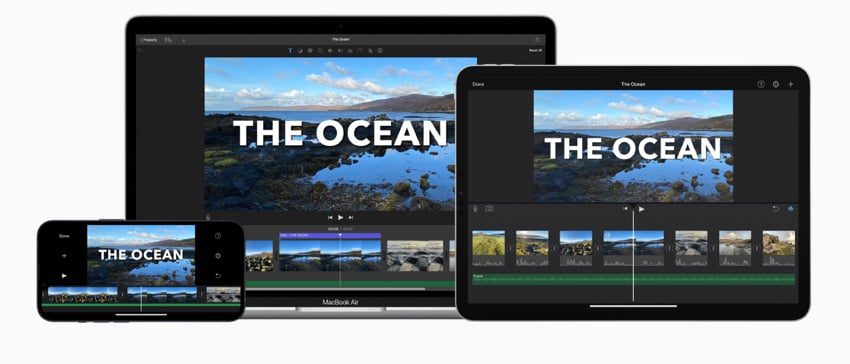
- You can bring iMovie with you and edit videos right after you film. iMovie works on Mac, iPad, and iPhone. Plus, projects sync via iCloud, so you can edit on one device and then seamlessly switch to another. (Keep in mind: iMovie works on Apple devices only, not PC or Android).


As you can see, iMovie is a top choice for your 2024 video edits. Now, let’s learn how to edit on iMovie, step by step.
How to Use iMovie (Step by Step)
Working in iMovie is meant to be easy, and it is. Below, we’ll walk through how to make an iMovie project from scratch. We’ll be using iMovie’s macOS version, available for free.

You’ll see stock video and music in use. Both clips are sourced from Envato Elements. You can download both the video and music to follow along with our iMovie tutorial.
1. Import the Video and Audio
To kick off our iMovie tutorial, go ahead and launch iMovie on your Mac. If you don’t have it installed, you can find it in the Mac App Store. But keep in mind: iMovie comes with any new Mac. Even if you haven’t installed it yourself, there’s a good chance that it’s already on your computer.
When you launch iMovie for the first time, you’ll see a blank window open. At the top, there are two tabs to select from. These are labeled Media and Projects. To see how to edit on iMovie, click on Projects. Then, click on the large + icon, labeled Create New.


You’ll see a popup option with two choices: Movie and Trailer. Movies are “normal” iMovie projects. Trailers are a cool special feature that you can use to create cinematic promos like those you see for films. Here, go ahead and choose Movie.
When you click Movie, your project is underway. On the screen, you’ll want to import video and optionally audio. To do that, click on the Import Media button.


You’ll be taken to a Finder window. Browse to the media files that you want to work with. Click the first, hold down Command, and click the others. Then, choose Import All in the lower right corner to continue our iMovie tutorial.


Now, you’ll see your footage and audio in the Project Media section. It’s time to get started with editing.
2. Sequence Clips and Media
The timeline in iMovie forms the bottom half of the screen. It’s where you’ll add, sequence, and work with your clips and media. Here, let’s add the video and audio that we just imported.
To begin, click on the video’s thumbnail in the Project Media panel. Then, hold down your cursor and drag it onto the timeline. Drop it into place, and you’ll see it appear. It’s how to use iMovie’s “My Media” panel. You’ll also see the video previewed in the upper right.


If you had other clips, you could simply repeat this process. Drag and drop them into place, and change the order by placing them in different spots.


To add audio, the process is identical. Click and drag on your music track, then drop it right below your video clip. It’s easy to see how to edit in iMovie with video and audio.
3. Apply Edits and Effects to a Video
You’ve just learned how to edit in iMovie by adding music and videos to a project. Sometimes, this is enough to get your video going, but it’s usually best to add effects to your video. These can span a wide array of possible edits.
For example, you might want to trim a clip to make it a little shorter, or you might want to add cool, dramatic effects. All these and more are possible, and they’re easy to do.
First, let’s shorten the length of the video. This part of the iMovie tutorial is a technique that you’ll use often. Let’s say that you want to shorten the clip to 25 seconds. To do that, hover your cursor over the right edge of the video track in the timeline.


When you do, you’ll see two arrows pointing in opposite directions. This is the trim feature in iMovie. To trim and shorten the clip, click and drag to the left. You’ll see a duration timer appear as you do. When you reach 25 seconds, release your cursor. Just like that, you’ve trimmed the video.
Now, let’s add an effect to the clip. To do that, click the clip in the timeline to select it. Then, above the video preview, click on the Clip filter and audio effects button.


There, click the button beside Clip Filter. The default value is None, but when you click it, the Choose Clip Filter menu opens.
Here, you can choose from an array of cool color filters. For example, let’s apply Western here by clicking on it. This gives the mountain scene in the clip a sunburnt, orange look.


Explore your other options here. Across the top of iMovie’s menu, you can browse titles, backgrounds, transitions, and more. You have a huge list of options to transform any video clip. Each one is as easy as clicking to apply it to your video project.
4. Edit Audio Tracks in iMovie
Don’t forget that audio is important too. After all, many great videos wouldn’t be complete without music in the background. Here, let’s see how to make an iMovie audio track sound its best.
Here, it’s a good idea to trim the music to fit the end of the video. To do that, repeat the trimming step you performed on the video above. Click and drag the right edge of the audio to the left. When it reaches the end of your video track, you’ll see that it snaps into place.
When you trim audio like this, it’s a good idea to add a fade to it. Otherwise, you’ll hear it abruptly stop in mid-note. To add an audio fade, hover over the right edge of the audio track in the timeline. Move slightly above the center. You’ll see a tiny dot appear, with a gray circle around it. This controls the fade on iMovie audio.


To complete the fade, click and drag this dot to the left. As you move, you’re telling iMovie where to begin fading the audio. Now, when you play back your audio, you’ll hear it smoothly fade out to silence. This is an elegant, cinematic effect that makes any video much more enjoyable.
5. Share With the World
As you can see, there are countless effects that you can add to your projects. Once you’re finished, there’s one final step: exporting your video to share with others.


To save your iMovie, go to the File > Share menu. It’s in the upper left corner of your iMovie screen. From the options, choose File again.
The File menu will appear. Here, you can give your video a name, description, and more. You can also choose key details like the playback resolution and quality. Choose these settings, and then click Next. There, you can choose where to save your video on your Mac.


In a few moments, your finished video will be exported. Now, you’ll find it as a shareable MP4 file. Just like that, you’ve learned how to edit an iMovie from scratch. It’s one of the simplest and best video editors for 2024 and beyond. Don’t hesitate to give it a try.
You just learned what iMovie is and why you might choose it. You also saw how to an edit in iMovie. These iMovie basics are more than enough to get you started. We worked through how to build stunning videos of your own with Apple’s free app.
But what if you want to elevate your skills to the next level? We’ve got you covered with more tutorials that teach you how to edit in iMovie. Below are several tutorials to help you grow your knowledge and explore new tools for editing and creating.
The Top Source for the Best Video, Audio, and Music (With Unlimited Downloads)
Media is everything when you work in Apple iMovie. So where’s the best place to find stock footage, music, and sound effects for your next project? Envato Elements! At Envato Elements, you’ll enjoy unlimited access to millions of stock video clips for a flat monthly rate. Plus, Elements includes royalty-free music and sound effects as well.


In total, you’ll enjoy unlimited downloads of millions of assets, with countless new ones added frequently. The library is vast, spanning video templates, photos, and graphics too. Every single piece of content is included in the unlimited-downloads offer.


Now, Envato Elements makes it easier than ever to find the right content for your next video. With the cool new AI Search tool, you can describe your project’s needs in just a few words. Then, the tool will search the library and find the perfect content just for you. It makes it easy to amaze your audience and produce videos in record time!
iMovie basics are easier to conquer with a great library like Elements. So what are you waiting for? Join Envato Elements today and get started.
You Can Start Creating Amazing iMovie Videos Right Now
With iMovie, you can create spectacular videos of your own, at home or on the go. In this iMovie basics tutorial, you learned how to make an iMovie production in just a few quick steps. We explored top features and options that help you craft productions that truly amaze.
Start imagining what you can create. Then, get started! Practice these iMovie tutorial steps and create a project of your own. You’ll be amazed by how easy it can be to learn how to edit in iMovie.


