I’ve always loved airplanes. My interest has always been with scale RC models, particularly warbirds. It wasn’t long after I started building and flying RC warbirds that I was drawn to scale competition. While I was competing, I started measuring my work against other modelers and friends, and over time, I learned techniques to accomplish that “real” look. There are many ARFs on the market today that make great starting points for producing competition-worthy planes. The models shown in this article are my MiG-3 and Mitsubishi J2M Raiden (Thunderbolt), both built from the ESM ARFs (unfortunately, they are longer available). Being a bit out of the ordinary, these planes aren’t modeled very often—always a good thing for scale competition. This article highlights some of the ways that I’ve learned to enhance the looks of your average scale model.
DO YOUR HOMEWORK
First, do your research. One of the most important aspects of detailing a model is to match the overall appearance of the full-size aircraft. Also, it is easy to “over weather” a model, so the key thing to keep in mind is to be subtle. Take the time to learn how the real aircraft was manufactured and with what materials. Aircraft with metal skins wear much differently than airplanes with surfaces covered with cloth and fabric. An interesting aspect of the MiG-3 is that only a portion of its fuselage has metal skin. The areas behind the cockpit and the outer wing panels were covered with laminated wood. These wood areas on the full-size plane were barren of surface detail—no rivets and panel lines for grime to collect on—so this is an important part of getting the model to look right.
Be sure to take into account exactly how and where the full-size plane was flown, beaten, and abused. A Pacific Theater fighter, like a Corsair or Hellcat that operated from an aircraft carrier and was subjected to salt water, will weather much differently than a P-47 Thunderbolt operating from the English countryside amid a lot of mud and dirt. An interesting element that I learned during my research was that most Japanese aircraft were finished with horrible paint, and thus, after only a few flights, the paint would start to peel and flake off. This left bare metal exposed with jagged shards of paint missing. Once you understand the background of your subject aircraft, you can start adding the appropriate type of weathering and detailing.
PANEL LINES
One of the best ways to add surface detail is to add panel lines. There are several ways to do this. If you have a model that is covered in a film and do not wish to cover it in fiberglass cloth, simply tape off different areas along obvious panel-line areas, then airbrush a light shading against the tape; a light coat will do. Using a paint heavily diluted with black, followed by a rust color, creates a good effect. When you pull off the tape, the separation line between the base color and the shading does a nice job simulating both the panel line and a bit of soot buildup.
If you have a fiberglass model, like the ones in this article, you can use tape in the same manner and then build up some hardware-store spray primer along the edge of the tape. Apply several coats, then let it dry. Lightly wet-sand with 400-grit sandpaper—just enough to expose the tape. Pull the tape back, and you’ll have a wonderful overlapped panel line. Thin, 1/32-inch-wide chart tape can also be used. If you spray over the tape and sand, it leaves a buildup on either side of the tape, producing thin panel lines that reproduce the look of panels butted up against each other to form a flush seam.
RAISED RIVETS
Raised, or “brazier-head” rivets were used on early aircraft, and to reduce air drag, they were replaced with flush rivets. I’ve found that the best application to make raised rivets is to use a syringe (available from any drugstore) filled with Zap Formula 560 Canopy. Simply apply the rivets with the syringe one dot of glue at a time. Use some inexpensive masking tape, and draw lines to evenly space the rivets; apply the drops of glue using the tape markings as a guide. It doesn’t take much time to perfect the method. And because the glue is water-based, you can use a sponge and some water to wipe it away if you mess up here or there.
FLUSH RIVETS
Rivets are other great eye-catchers that don’t take long to apply. For flush rivets, you’ll need to use an inexpensive soldering iron, which you can get from a discount store. I spent $4 for one at Harbor Freight Tools, and it works perfectly. Use one with a detachable head, and insert a length of brass tube that is the same diameter as the rivets you want to simulate. Use a pencil to draw a guideline for the rivet placement; once the brass tube has heated up, go along the line and burn the rivets into the plane’s surface. Applying flush rivets while the plane is still in primer works best. You don’t have to hold the iron in place for long; all you want to do is melt the primer coat. Note: Don’t try this with a film-covered airplane.
HATCHES
Maintenance hatches are another great detail to add to your airplane. I use thin G-10 fiberglass sheets available from FTE (franktiano.com). You can easily cut G-10 to any length and shape with a sharp pair of scissors. G-10 does not bubble or shrink in the sun, like thin styrene plastic can; you simply glue it in place. Some extra detail can be added by installing small #0 screws along the edges of the panels for a nice 3D effect. Hatches can also be quickly applied using aluminum- heater duct tape, which is easy to cut to size. Just peel off the backing, and stick it in place. Use a smoothing tool (like an old propeller blade) to burnish it into place.
PAINTING
When you have all the panel lines, rivets, and hatches applied, it’s time to paint. And it is the application of the paint that helps make these details stand out. For worn-out, weathered warbirds, inexpensive paint is fine, but for the best results, I prefer to use Tamiya spray paints. Apply a flat aluminum paint for the base coat. Once it has dried, scuff it up lightly with some 0000 steel wool, then apply the finish paint.
After your paint has dried, use some 000 steel wool and rub the paint down. Use horizontal strokes to match the airflow over the wing and vertical strokes over the fuselage. Use some soapy water with this, as well. After several strokes, you will start to notice the silver undercoat coming through. This effect is prevalent around hatches and along panel lines as they are raised and the paint in these areas gets removed first. Play around with this technique, but take it easy to just bring out the details in your plane.
To produce the heavily chipped look of the Japanese Raiden, I simply apply some tape as the paint just starts to dry and then immediately pull the tape off hard. Some of the paint will come off and produce a jagged, flaked-off appearance. This is also a great technique to use on the leading edges and other high-wear areas, like the sides of the canopy of most aircraft.
PROPER PROPS
At contests, I often see nice models with a horrible-looking wood flying propeller stuck on its nose. This ruins that scale look. Do a little research, and paint your propeller to match the full-size airplane’s prop. With the MiG-3, I found the color scheme that I needed and simply painted a Falcon sport prop. This makes the plane stand out and improves its authentic look. If you don’t want to go to the trouble of painting your flying prop, then go out and buy a Xoar World War II–style prop. It comes right out of the package painted black with yellow tips. It looks much better than a stock wooden sport prop, and it provides excellent flight performance.
BOTTOM LINE
There are many different ways to spruce up your scale model, and these techniques are just some of the basics. Anyone can add detail to improve the model’s scale appearance. With a little effort, you can turn your ARF warbird into a great-looking, competition-ready plane. Don’t be scared to try, and never tell yourself that you can’t do it. It just takes a little time and a willingness to learn something new.
Here, you can see thin chart tape applied to where the panel lines will be. They have been sprayed over with a few coats of primer to build up the surface.
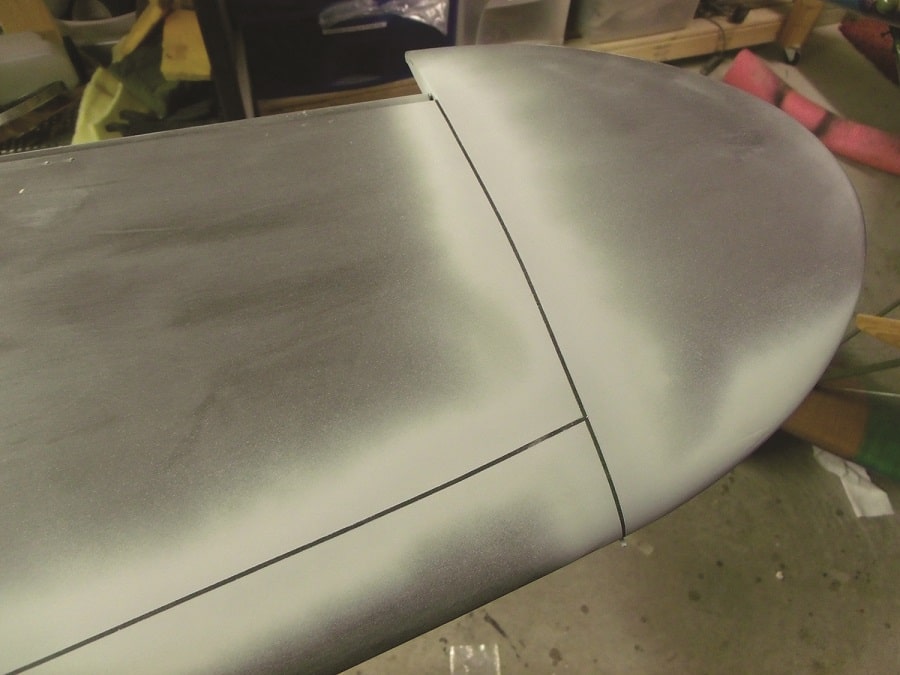
After sanding lightly, the tape is removed to leave the thin panel-line details.
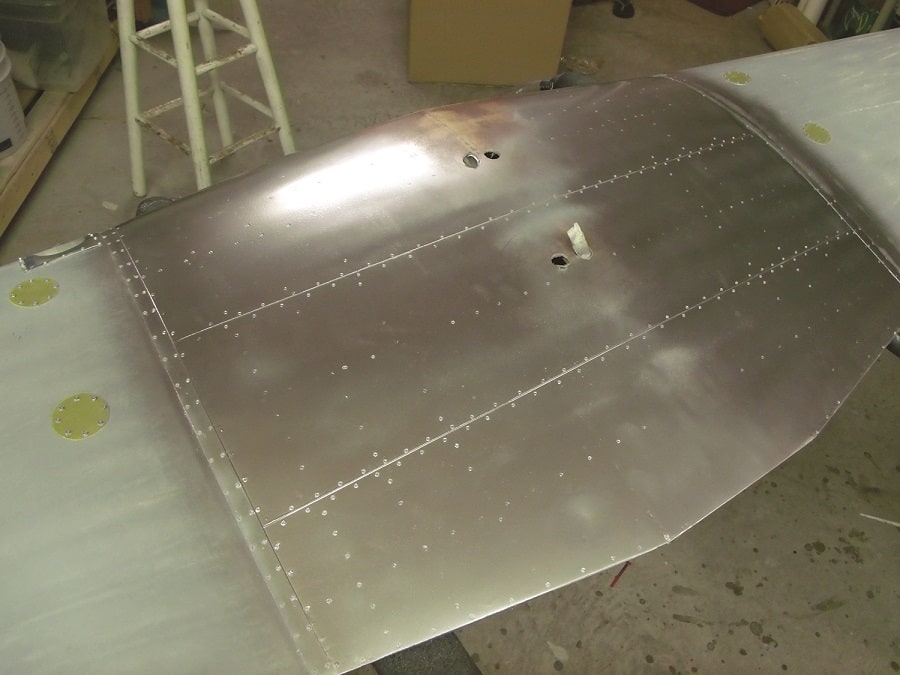
Here you see the panel lines and rivets added to the wing center section. This type of detailing is a great way to add surface realism to your model.
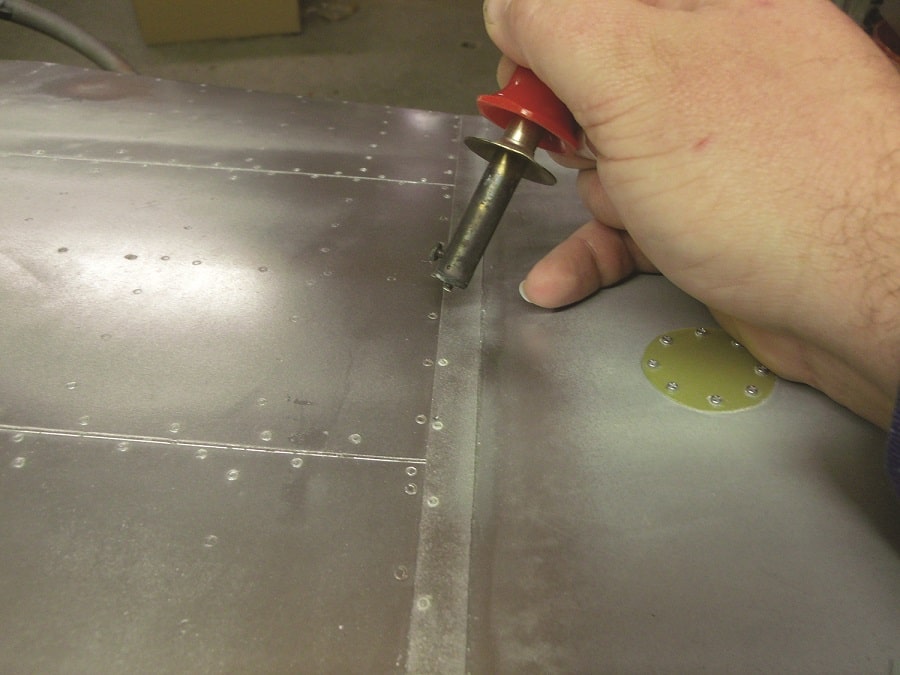
To produce flush rivet detail, first prime your model and then use a soldering iron with a small brass tube inserted into the end. You can then burn the round rings into the primer to represent the heads of the rivets.
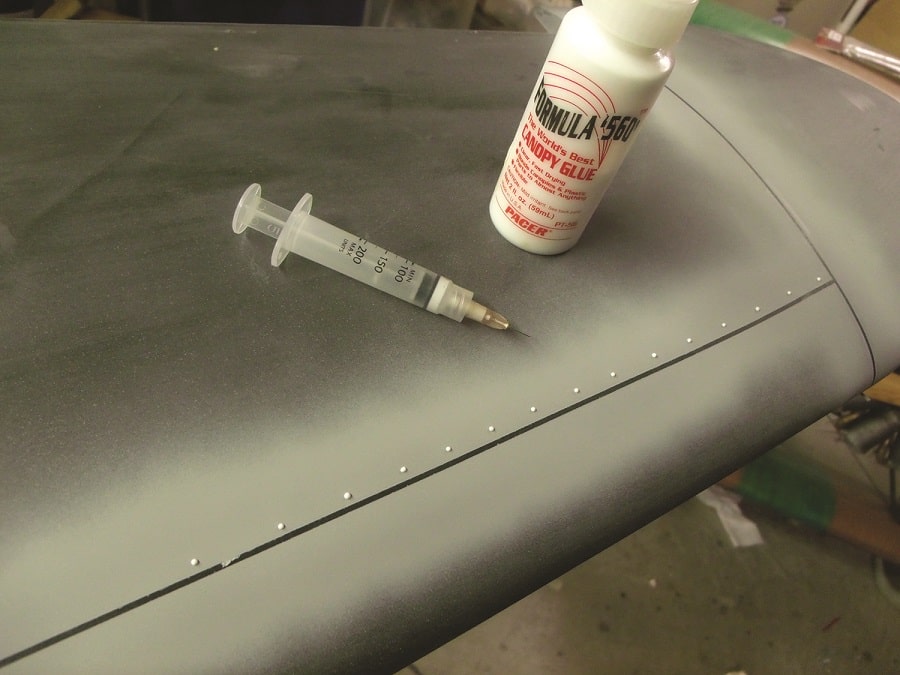
Here, you can see some fresh raised rivets applied using Zap Formula 560 Canopy Glue. After the glue has dried, the surface can be painted.
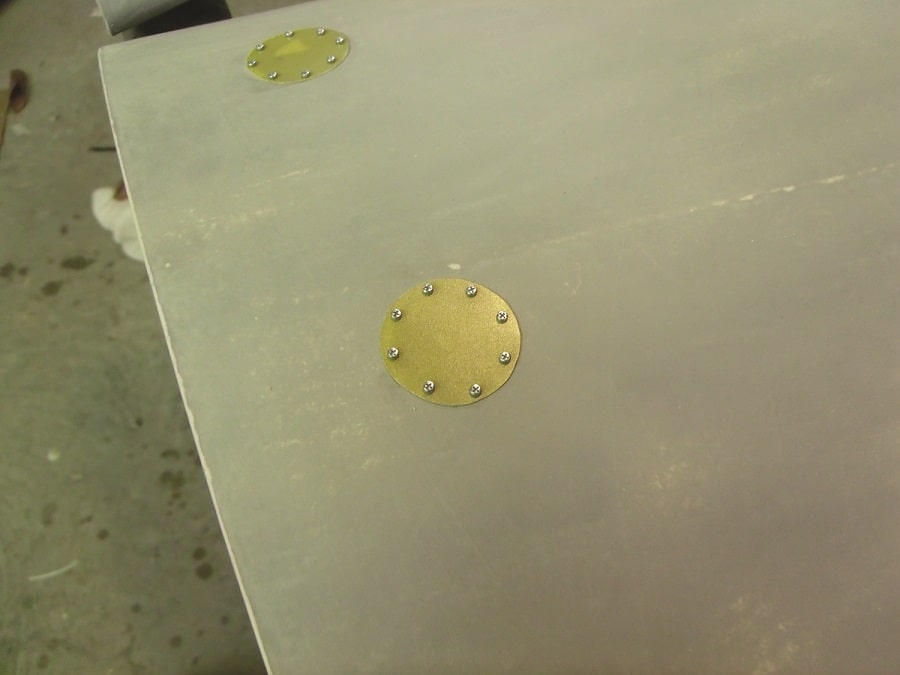
Another way to add to the surface detail is to add hatch covers. Thin G-10 fiberglass works well.

Aluminum-heater duct tape burnished down onto the model makes an excellent hatch. A few tiny screws add to the effect.
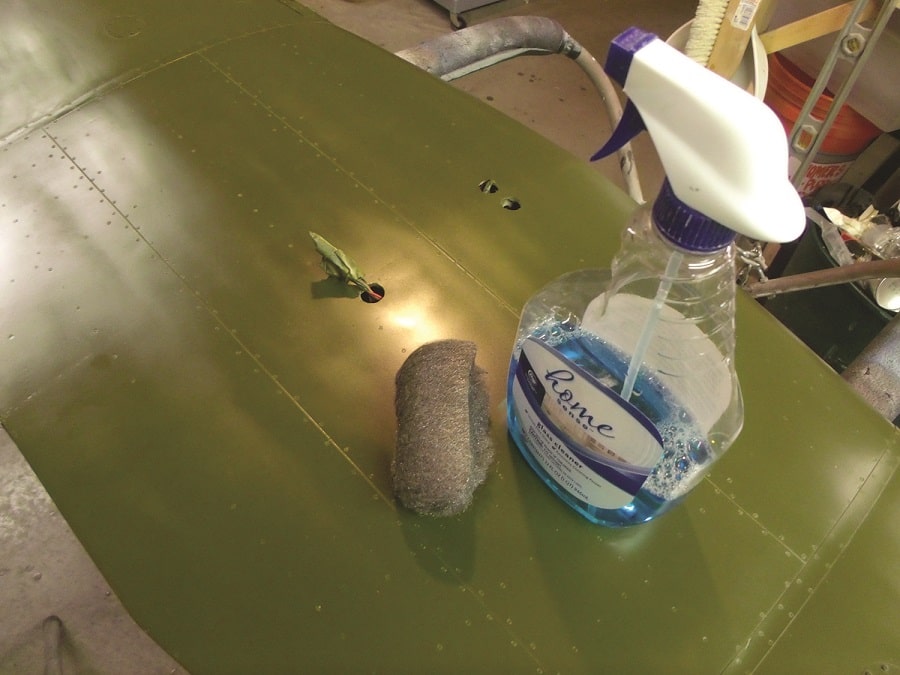
After painting your model, use some steel wool and some window cleaner (to wet the surface), rubbing in the direction of the airflow.
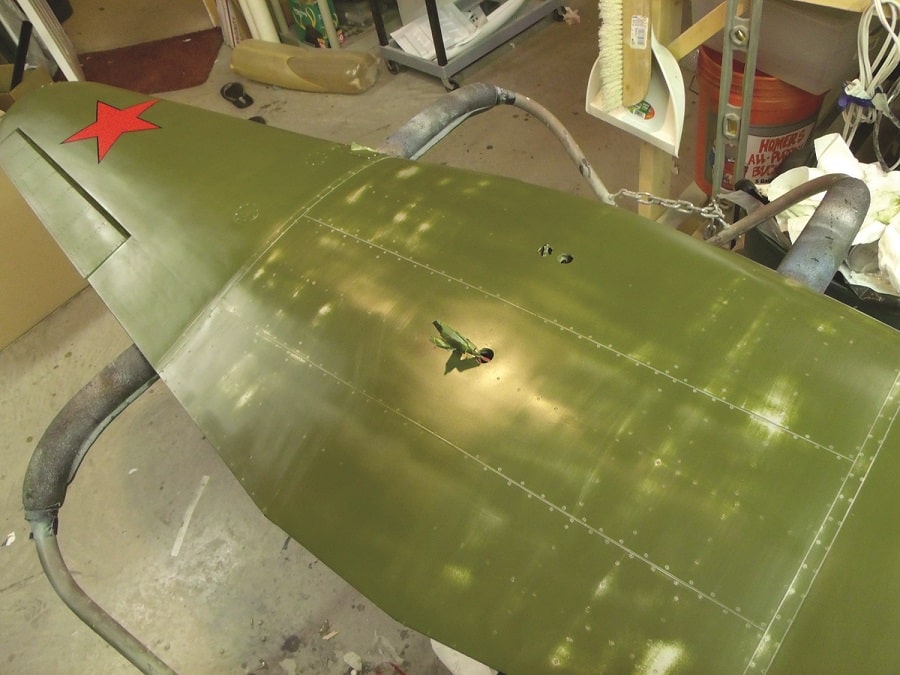
After a while, the rubbing will start to bring out the silver undercoat. Go slow, and be subtle.
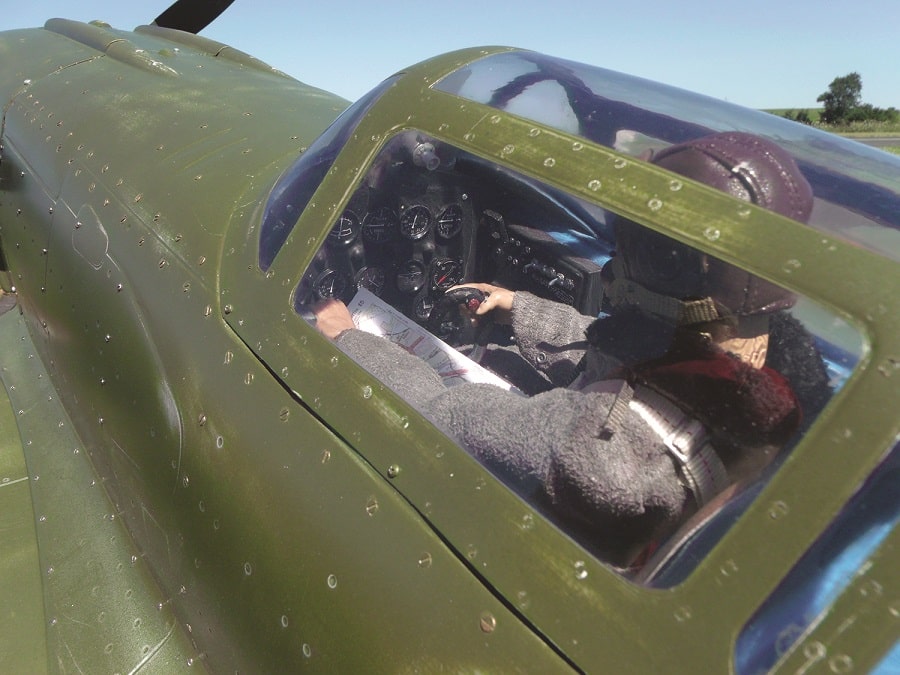
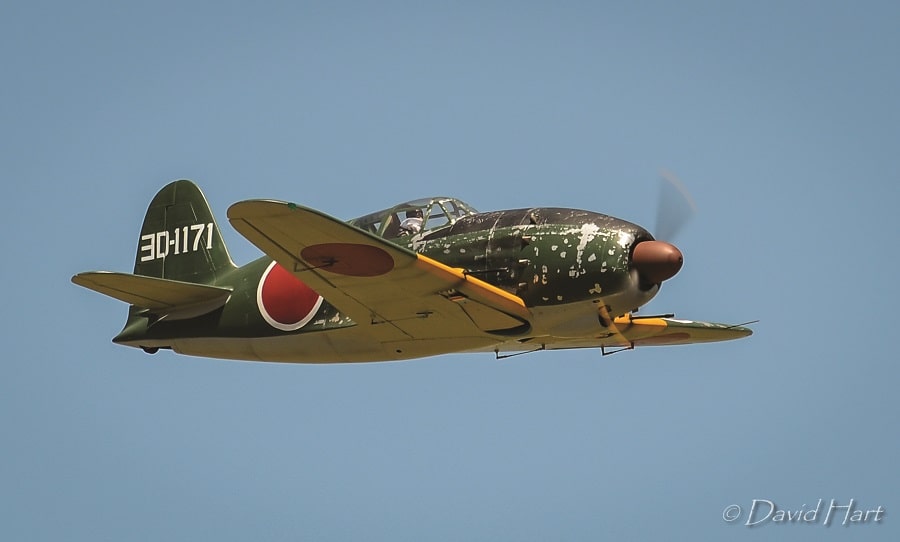
Yes, you should have a Japanese pilot in a Japanese fighter. (Check out the chipped paint along the canopy framings!)
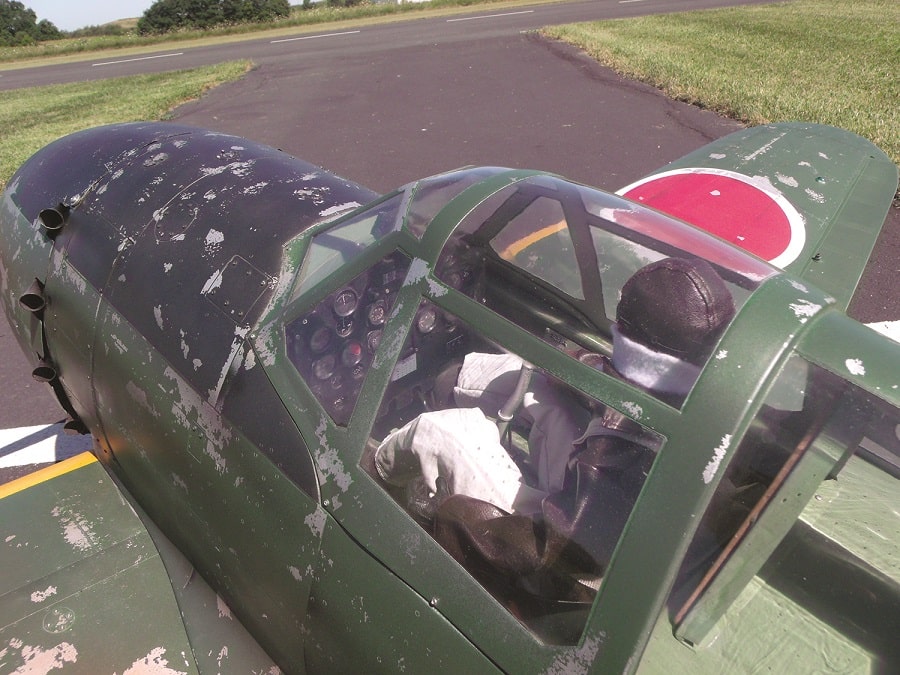
Although not covered in this article, some detailing inside the cockpit goes a long way to improve the model’s appearance.
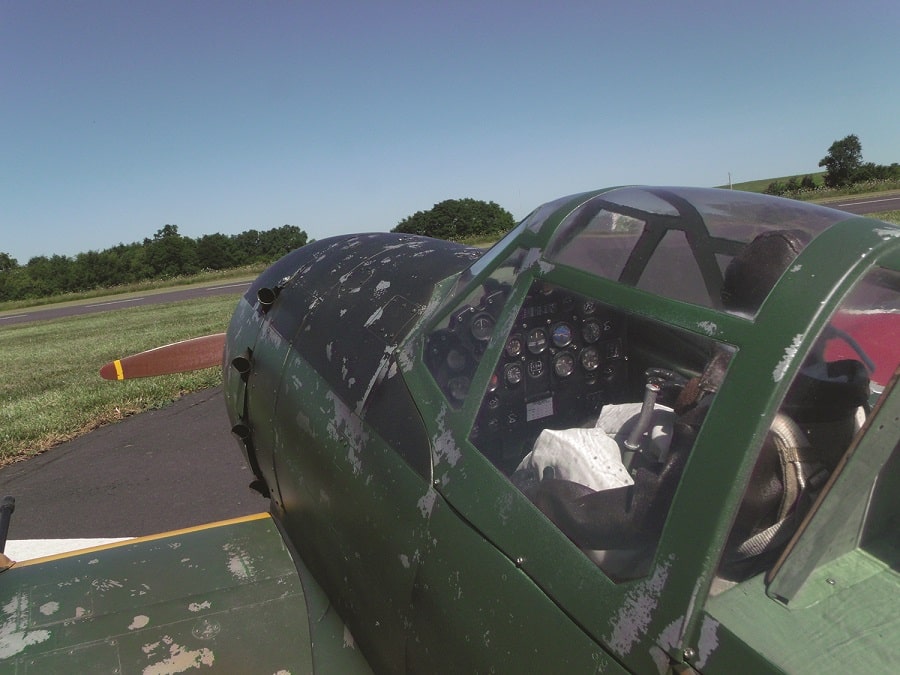
You want to carry your chipping and wear onto the canopy framing.

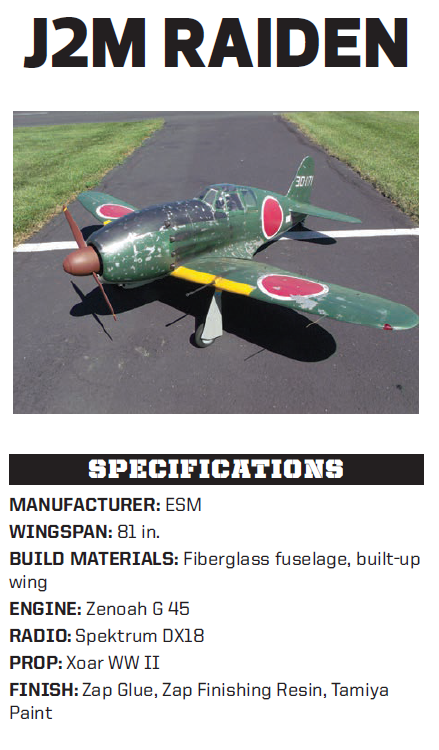
Far from being subtle, the heavy paint chipping on the J2M Raiden should be done at areas of increased wear, such as on the leading edges of the wing and below the canopy. The combination of chipped paint and panel lines creates a lot of eye-candy without much effort.
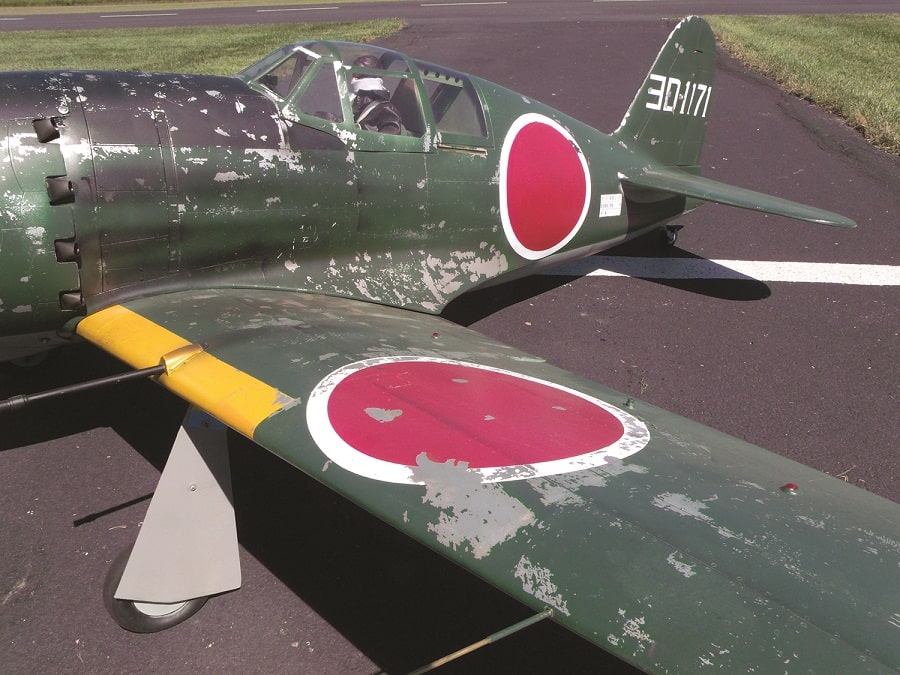
Here you see the heavy chipping and peeling goes into the wing insignia as well.
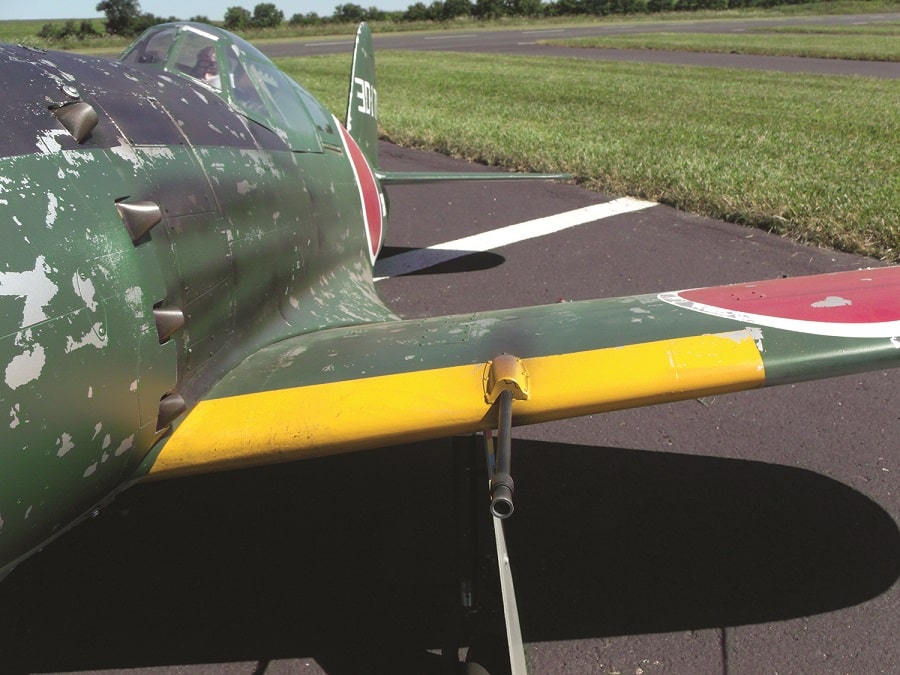
Other additions to increase realism are exhaust streaks and machine-gun blast residue on the wing. Start subtle, as too little is much better than too much.
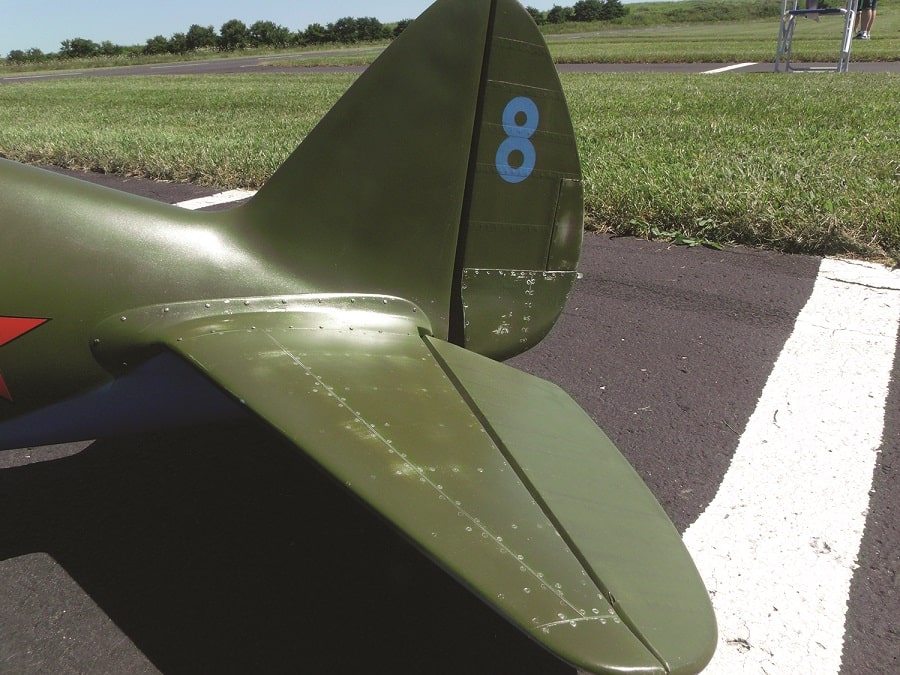
And don’t forget to weather the metal panels on the tail surfaces.
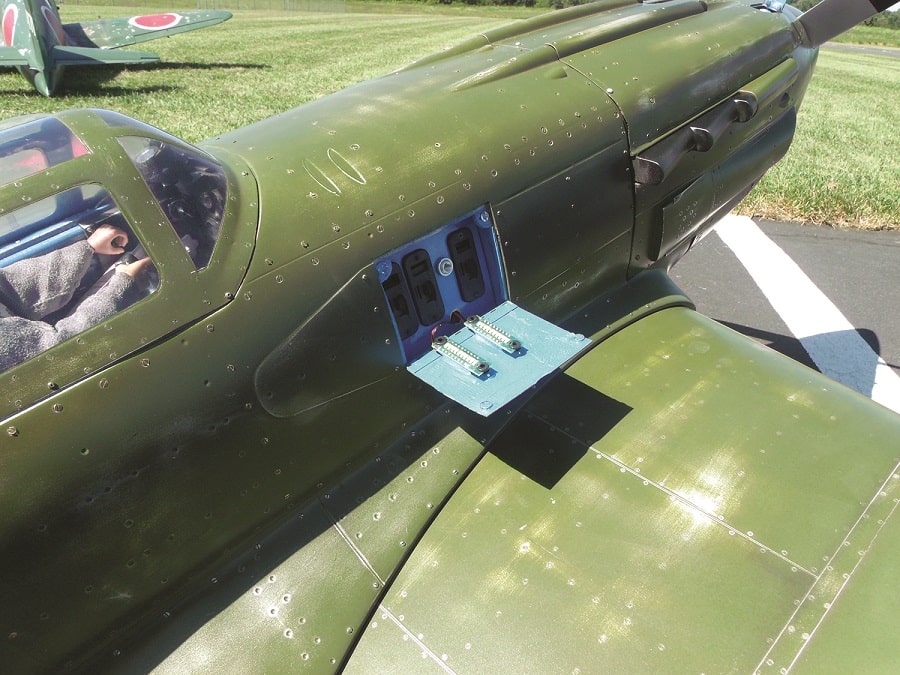
And here’s a final makeover tip: Whenever possible, be sure to hide your radio switches and other RC hardware so as to not spoil all your weathering efforts on the outer surface.
And here’s a final makeover tip: Whenever possible, be sure to hide your radio switches and other RC hardware so as to not spoil all your weathering efforts on the outer surface.
By P. J. Ash | Photos By David Hart & P. J. Ash


